
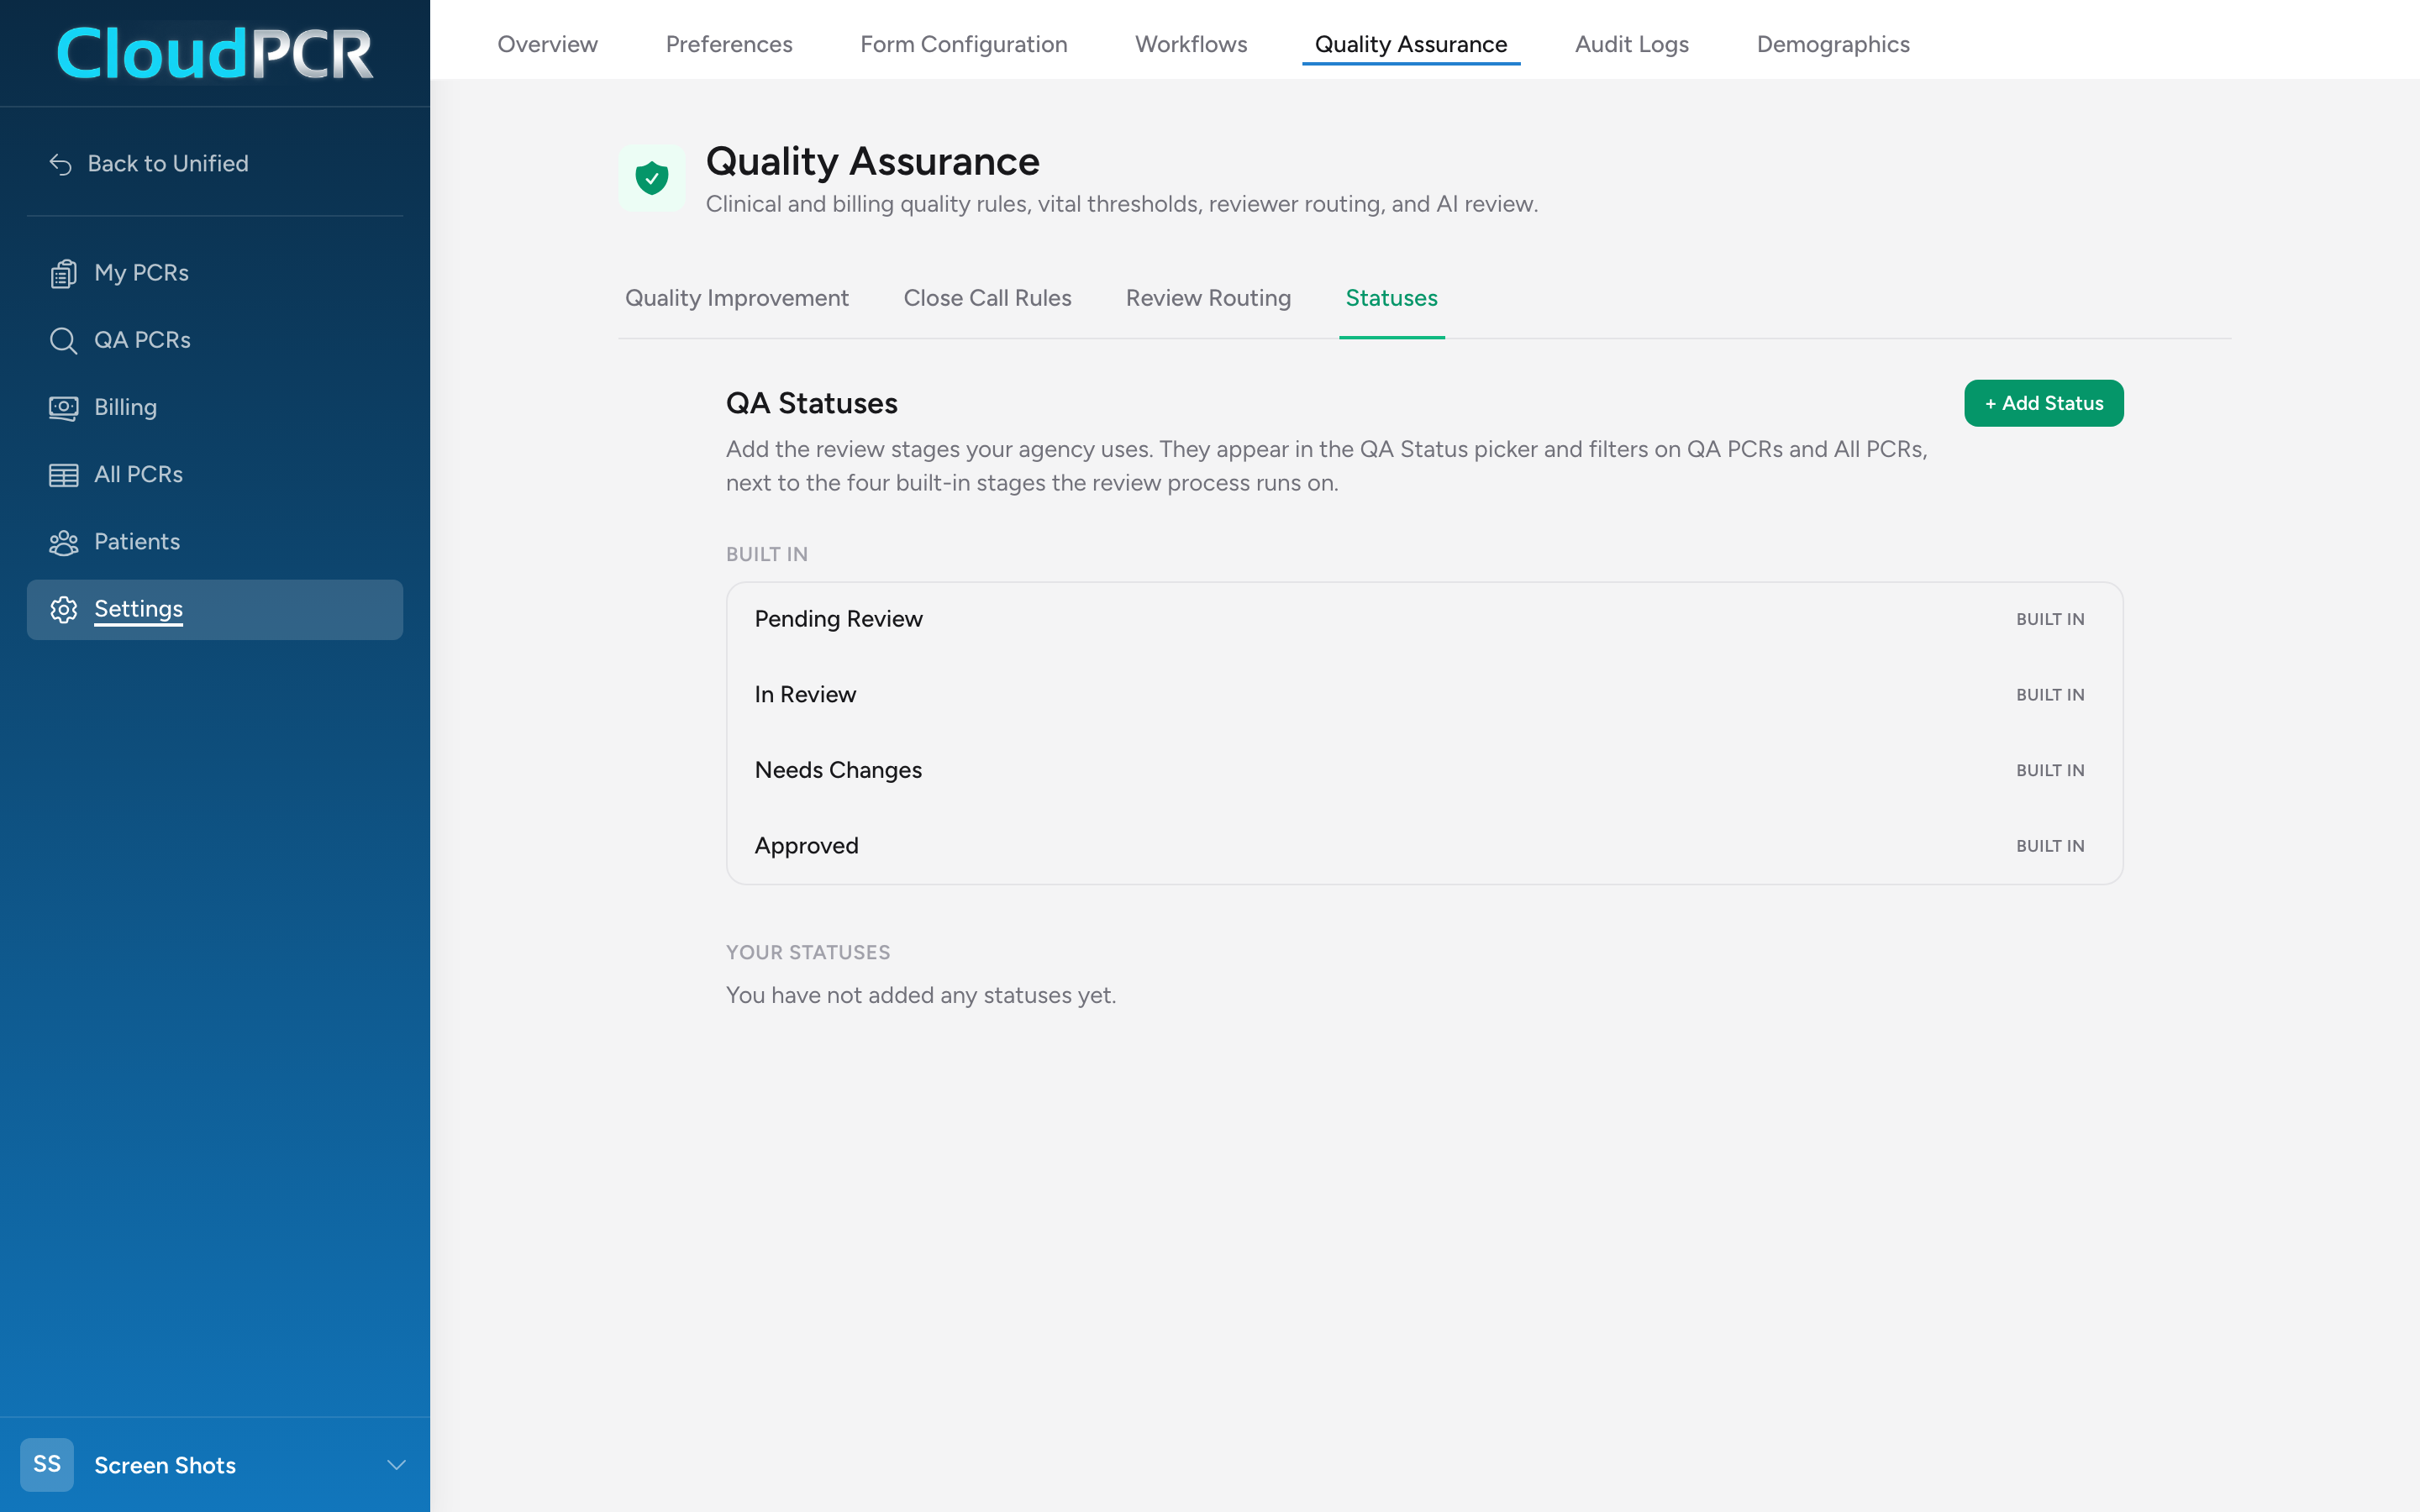
Every chart in review carries a QA status. CloudPCR ships with four: Pending Review, In Review, Needs Changes, and Approved. The review process runs on those four, and they cannot be changed or removed. If your agency follows extra steps that those four do not describe, you can add your own.
Before you start: Settings is admin-only. If you do not see Settings in the menu, your account does not have an admin role.
Open the Statuses tab
- From the menu, click Settings.
- Click Quality Assurance.
- Click the Statuses tab.
The page splits into two lists. Built in holds the four stages the review process runs on, each with a Built in tag and no way to edit or delete it. Your statuses holds the ones you add. It starts out reading "You have not added any statuses yet."
Adding a status
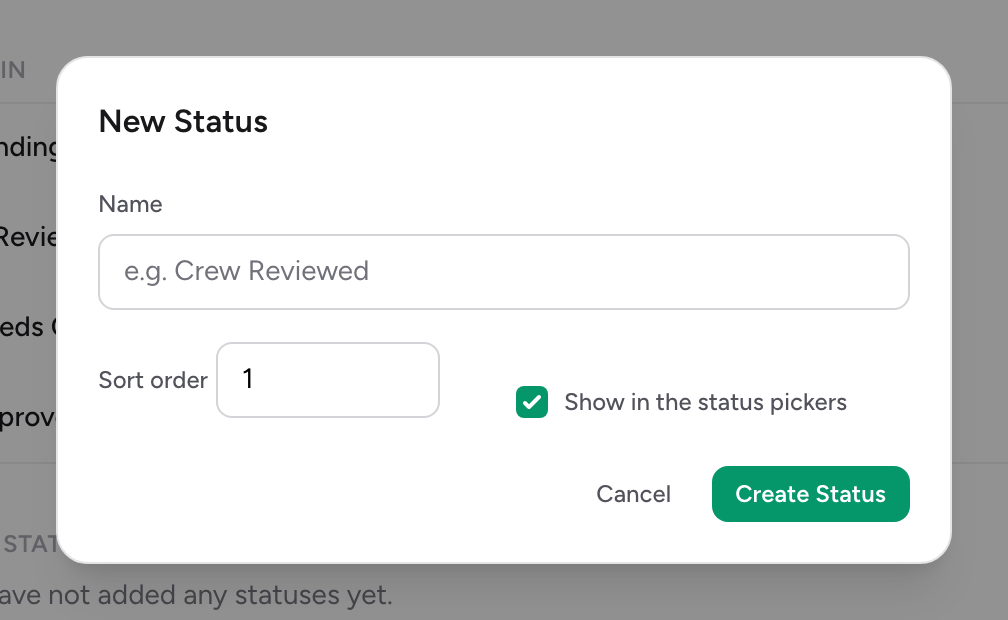
- Click + Add Status.
- Type a Name. Keep it short enough to read on a crowded list, up to 60 characters. The box suggests
Crew Reviewedas an example. - Set the Sort order if you care where it sits in the dropdown. Lower numbers come first. CloudPCR fills in the next number for you, so you can usually leave it alone.
- Leave Show in the status pickers checked so reviewers can pick it.
- Click Create Status.
To change one later, click Edit on its row, make the change, and click Save Changes. Renaming a status updates it everywhere, including on charts already sitting at it.
Retiring a status
Two ways, and they are not the same:
- Hide it. Edit the status and uncheck Show in the status pickers. It picks up a Hidden tag on the settings list and stops appearing in the dropdown, but charts already at that status keep it. Use this when you might want it back.
- Delete it. Click Delete on the row, then Delete again in the confirmation. As the confirmation says, charts already sitting at that status keep it on their record, but nobody will be able to pick it again.
Where your statuses show up
A status you add appears wherever a reviewer picks one:
- The QA Status column on the QA PCRs queue, where reviewers change it right on the row.
- The QA Status dropdown in the Status & Actions card when reviewing a chart.
On All PCRs and Billing PCRs the QA Status column shows your statuses but does not let you change them. That column starts out hidden on both lists; turn it on from Choose columns if you want to see review progress from there. See Choosing the columns on your PCR lists.
An example
Your service has the crew chief look at every chart before it reaches the QA officer. The built-in four have no word for that middle step, so charts sat at In Review for days and nobody could tell whose desk they were on. Add a status named Crew Chief Reviewed. Now the chief works the queue, sets each chart to Crew Chief Reviewed, and your QA officer filters on it to see exactly what is ready for them.
Good to know
- The four built-in stages still drive what happens automatically. Opening a chart from the queue moves it to In Review, and sending a flag moves it to Needs Changes. Your own statuses are ones a reviewer sets by hand.
- Your statuses show in plain grey. Colors are not something you set.
- Two or three extra stages is usually plenty. A long dropdown slows reviewers down more than it helps.