Clicking into a PCR from the QA PCRs queue opens the QA Clinical Review screen. It is a read-only view of the full chart with reviewer tools on the right.
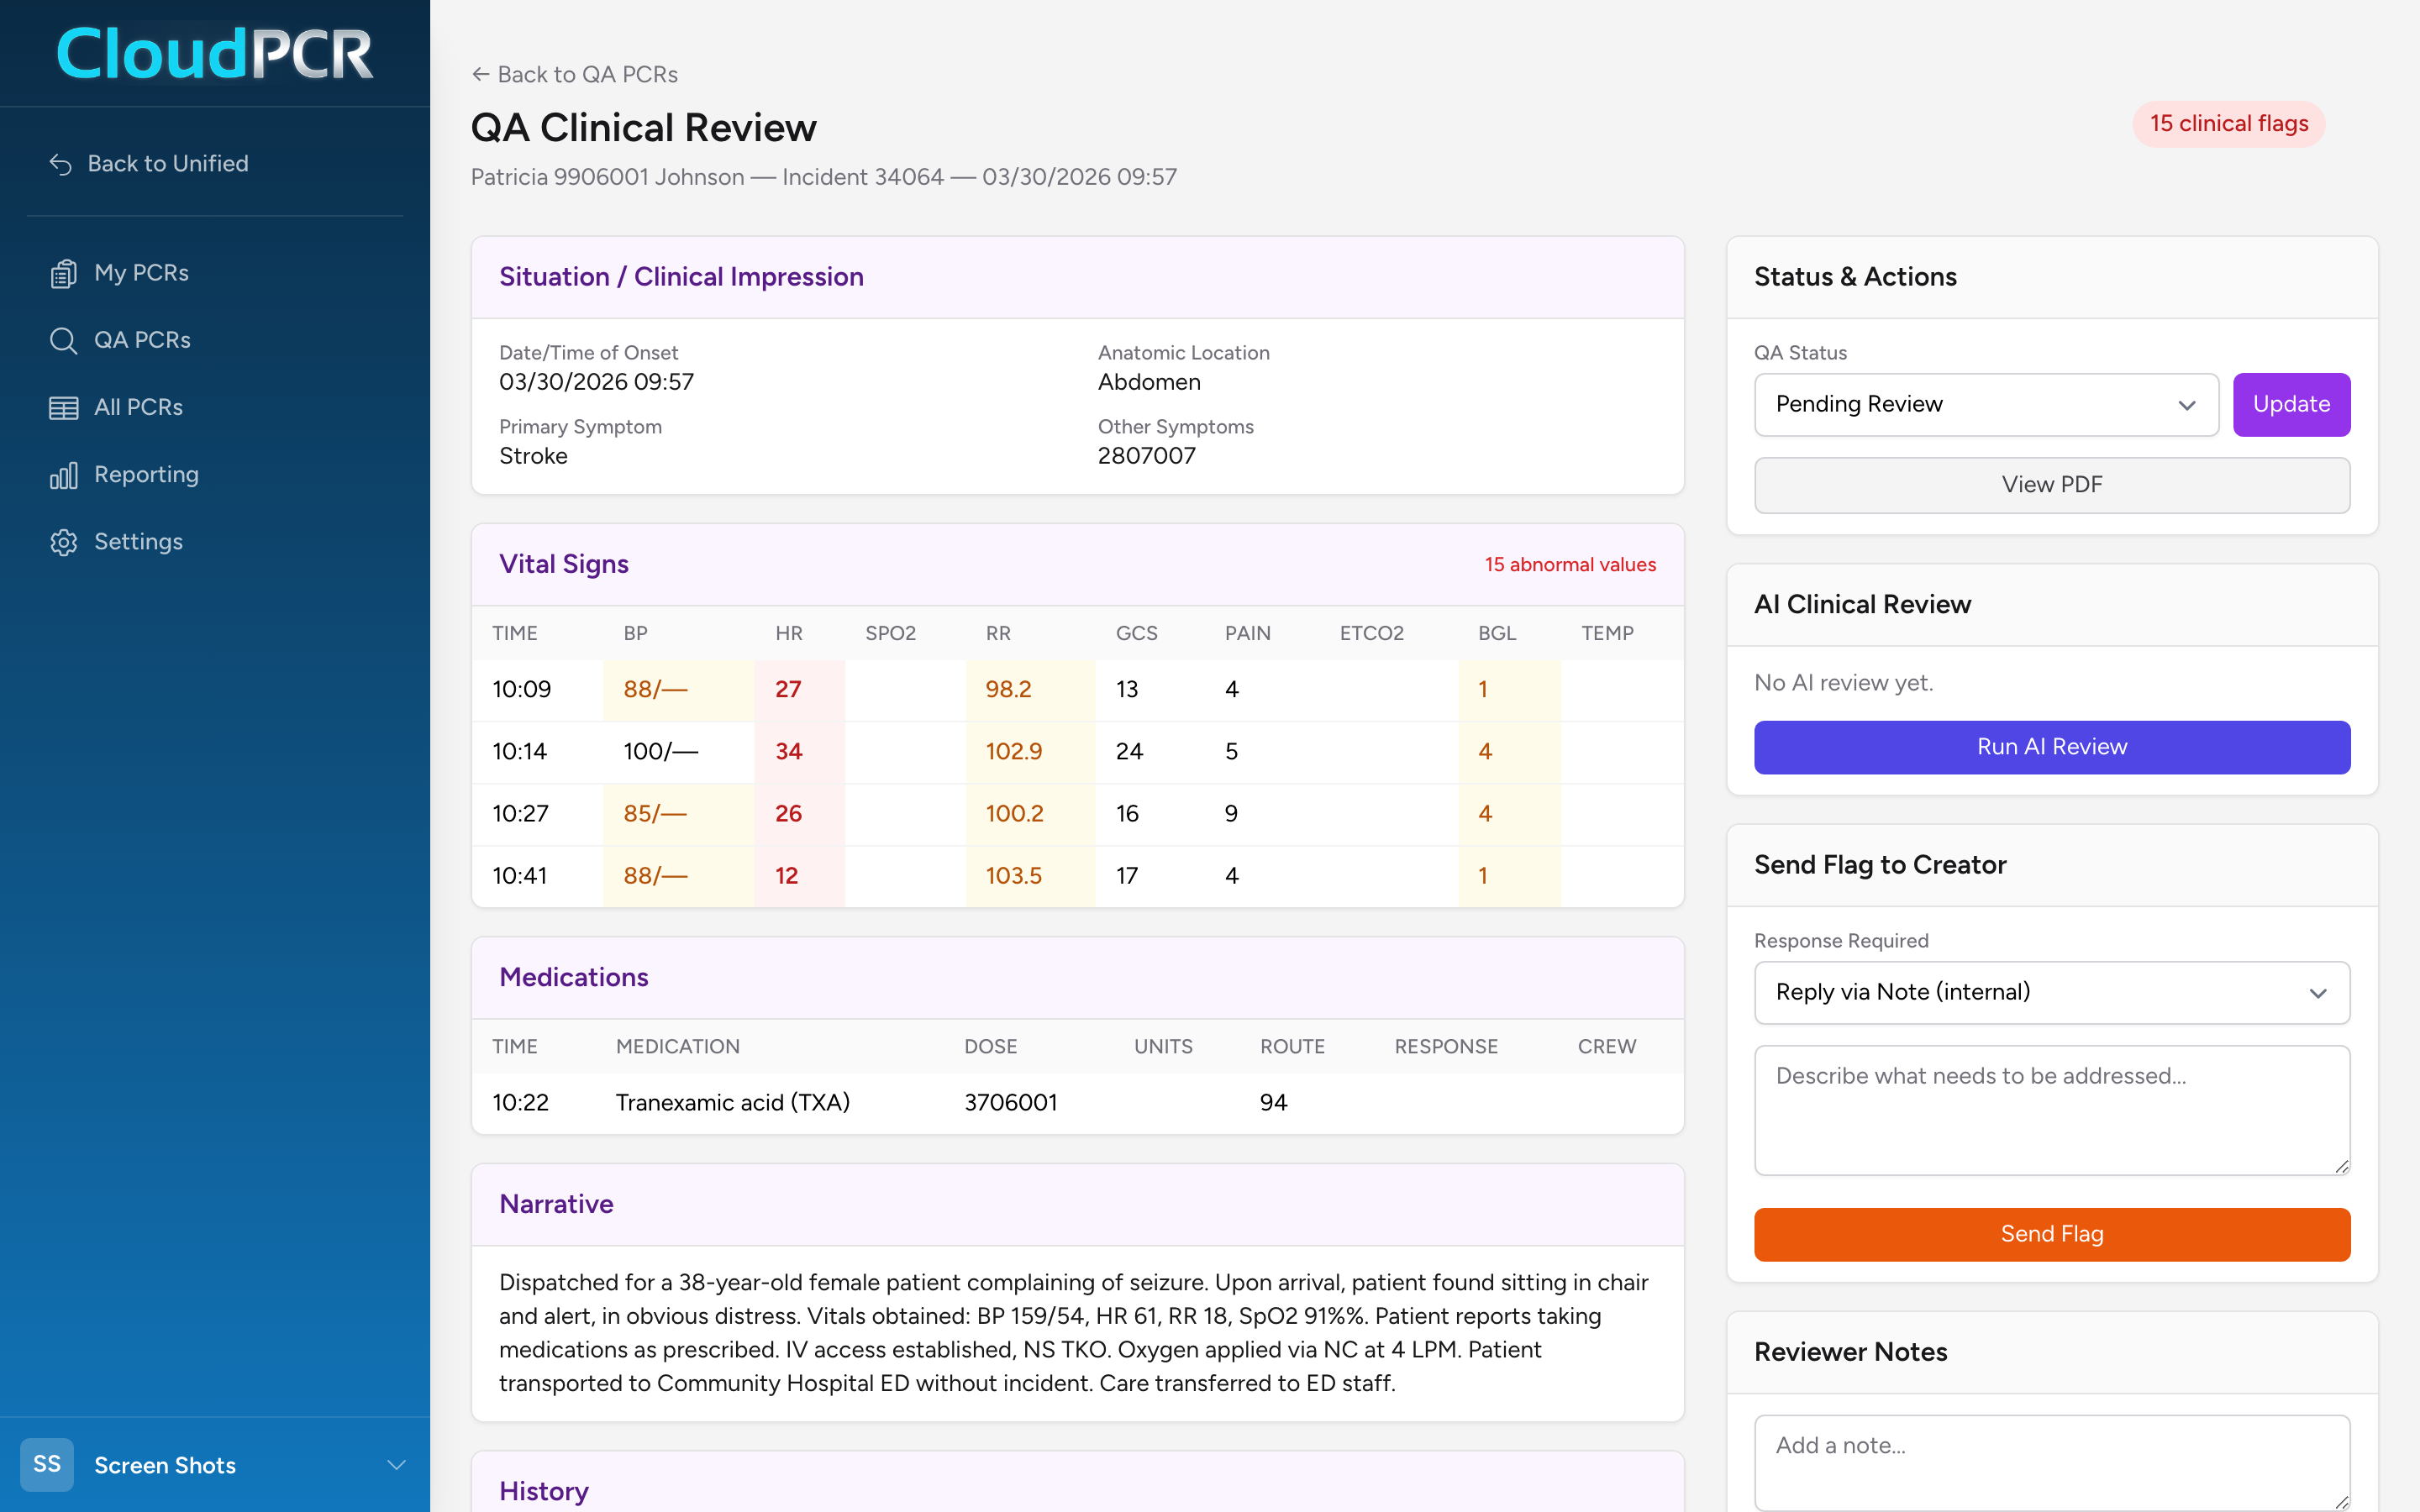
What is on the screen
Header: patient name, incident number, incident date. Badges show the clinical flag count and the current QA status. A ← Back to QA PCRs link returns you to the queue.
Left side — the PCR. Read-only cards summarize each section in the order they appear on the PCR: Situation / Clinical Impression, Vital Signs (abnormal values highlighted), Medications, Procedures, Cardiac Arrest (if any, in a red-outlined card), Physical Exam, Narrative, History, Protocols, Disposition, Times, and any Addenda.
Right side — reviewer tools, split into cards.
Updating the QA status
- In the Status & Actions card, open the QA Status dropdown.
- Pick the new status:
- Pending Review — not yet picked up.
- In Review — you are working on it.
- Needs Changes — the creator needs to fix something.
- Approved — the PCR passes review.
- Click Update.
The View PDF button opens the PCR as a printable PDF in a modal — useful for reading a full narrative or exporting a copy.
AI clinical review
In the AI Clinical Review card, click Run AI Review. CloudPCR runs an automated review and returns:
- A quality badge — excellent, good, adequate, or needs improvement.
- A short summary paragraph.
- Scores for Documentation and Clinical Decision.
- A findings list with severity tags (critical, moderate, minor, info).
- A strengths list.
Click Re-run AI Review to run it again after the creator makes changes. The AI review is a starting point — you are still the reviewer of record.
Sending a flag to the creator
- In the Send Flag to Creator card, pick what kind of response you need:
- Reply via Note (internal) — the creator replies with an internal note.
- Add Addendum (official ePCR) — the creator must add a formal addendum to the record.
- Type your message explaining what needs to change.
- Click Send Flag. The creator gets a notification.
Every flag on the PCR — open, responded, or resolved — is listed in the Flag History card below the Send Flag form. When the creator responds, the flag status changes to responded and a Resolve button appears on that flag. Click it once you are satisfied with the response.
Reviewer notes
The Reviewer Notes card is for your own record-keeping. Type a note and click Add Note. Notes stay with the PCR and are visible to other reviewers.
An example
A cardiac arrest PCR is in your queue. Open it. The Narrative mentions ROSC but the Vital Signs card does not show a ROSC time and the Cardiac Arrest card does not either. Send a flag: Reply via Note, message "ROSC was achieved per the narrative — please add the ROSC time on the Assessment tab so the registry pulls it correctly." Set QA Status to Needs Changes and click Update. The medic gets a notification, opens the PCR, fixes the time, replies, and the flag shows as responded. Click Resolve on the flag, then set status to Approved and click Update.