
Dispatch vs. Assign
CAD has two ways to put a unit on an incident:
- Dispatch — assigns the unit and immediately flips it to En Route. Use this when you want the crew moving right now.
- Assign to Unit — reserves the unit for this incident but does not put them en route yet. Use this to pre-stage a unit for a scheduled transport that is not going out yet.
From the actions menu
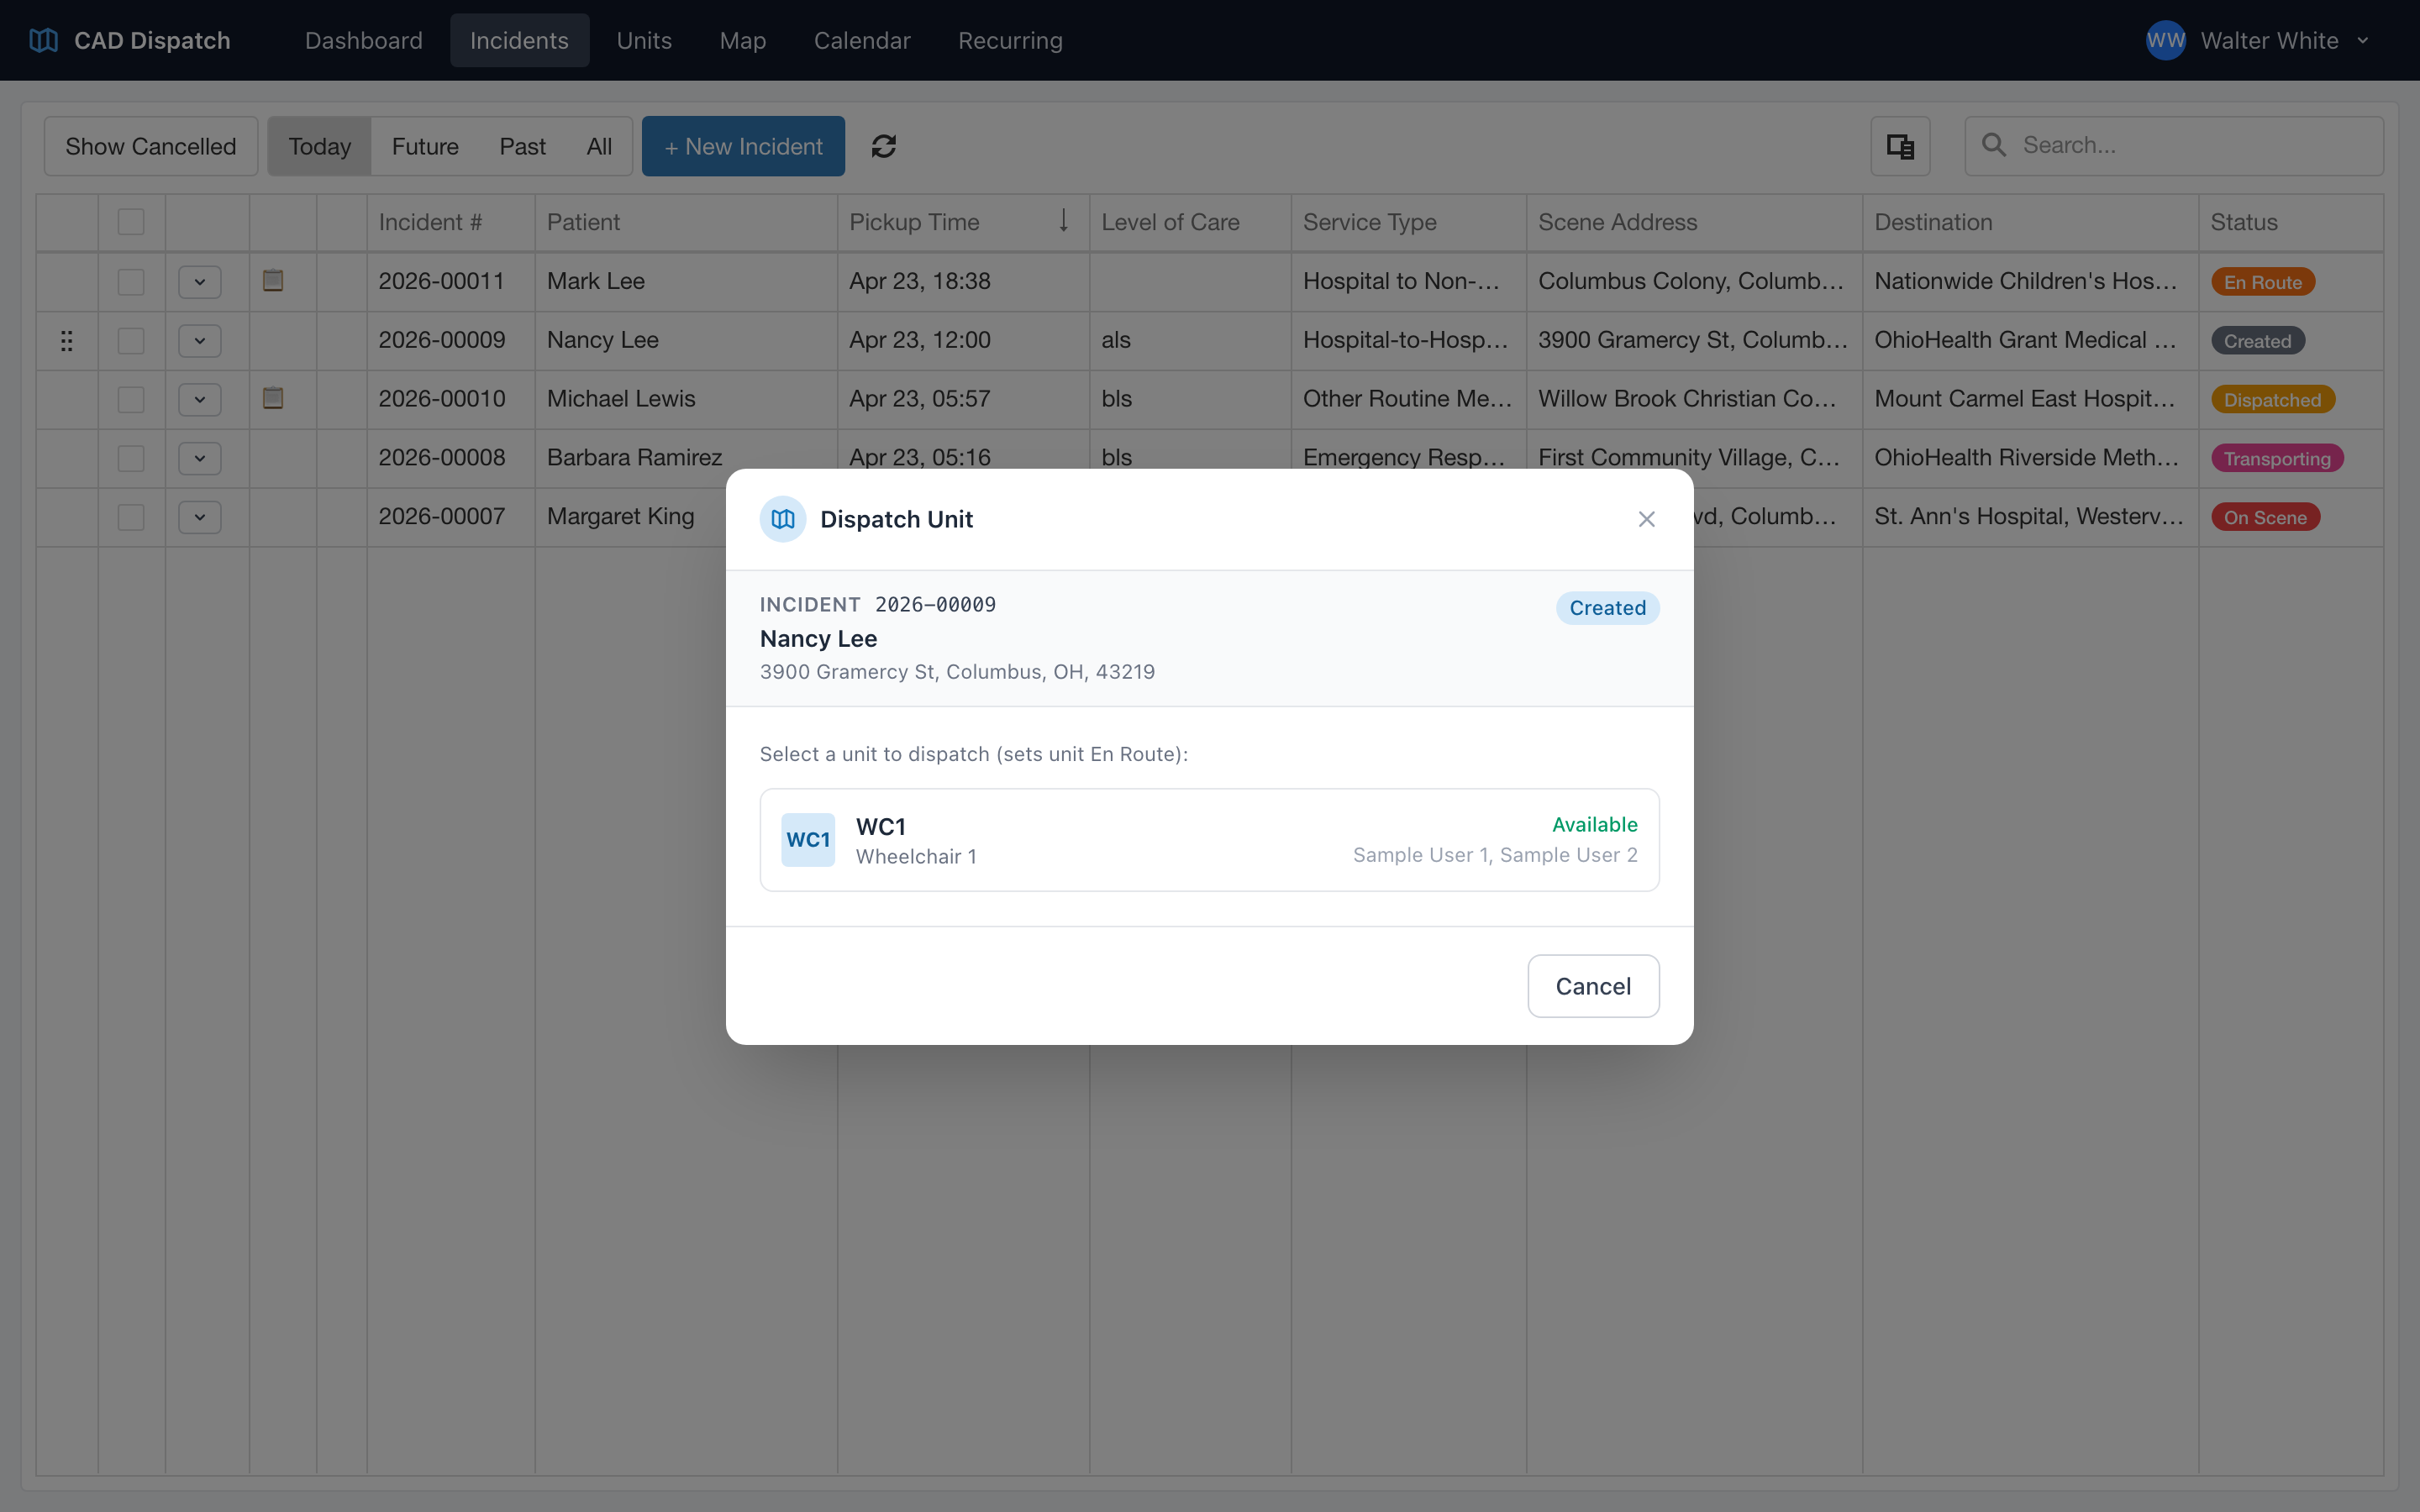
- On the dashboard incidents tile, or from the navigation click Incidents to open the Incidents page.
- Find the incident you want to dispatch.
- Click the ... actions menu on the row.
- Click Dispatch or Assign to Unit.
- A dispatch window opens showing the incident summary and a list of available units.
- Click the unit card you want to dispatch.
If you chose Dispatch, the unit status flips to En Route and the incident moves to Dispatched. If you chose Assign to Unit, the unit is reserved for this incident but will not go en route until you dispatch them later.
Drag and drop assign
When you have both the incidents table and the active units table on screen at the same time — for example, in the Default or Incidents & Units layouts — you can assign a unit by dragging.
- Click and hold the incident row.
- Drag it onto the unit you want.
- Drop.
- CAD assigns the incident to that unit and shows a confirmation toast.
Drag and drop assigns the unit — it does not put them En Route. Use the actions menu if you want to dispatch and flip the unit to En Route at the same time.
Which units can be dispatched
Units that are already on a call do not show up in the dispatch window. Units with a status of Available, At Post, En Route to Post, Out of Service, or Decon can all be assigned. If no units qualify, the dispatch window tells you there are no available units — you will need to wait for one to come clear or activate another unit.