
Where to start
You can start a new incident from two places:
- The + New Incident button on the dashboard.
- The + New Incident button on the incidents page.
Both open the same form.
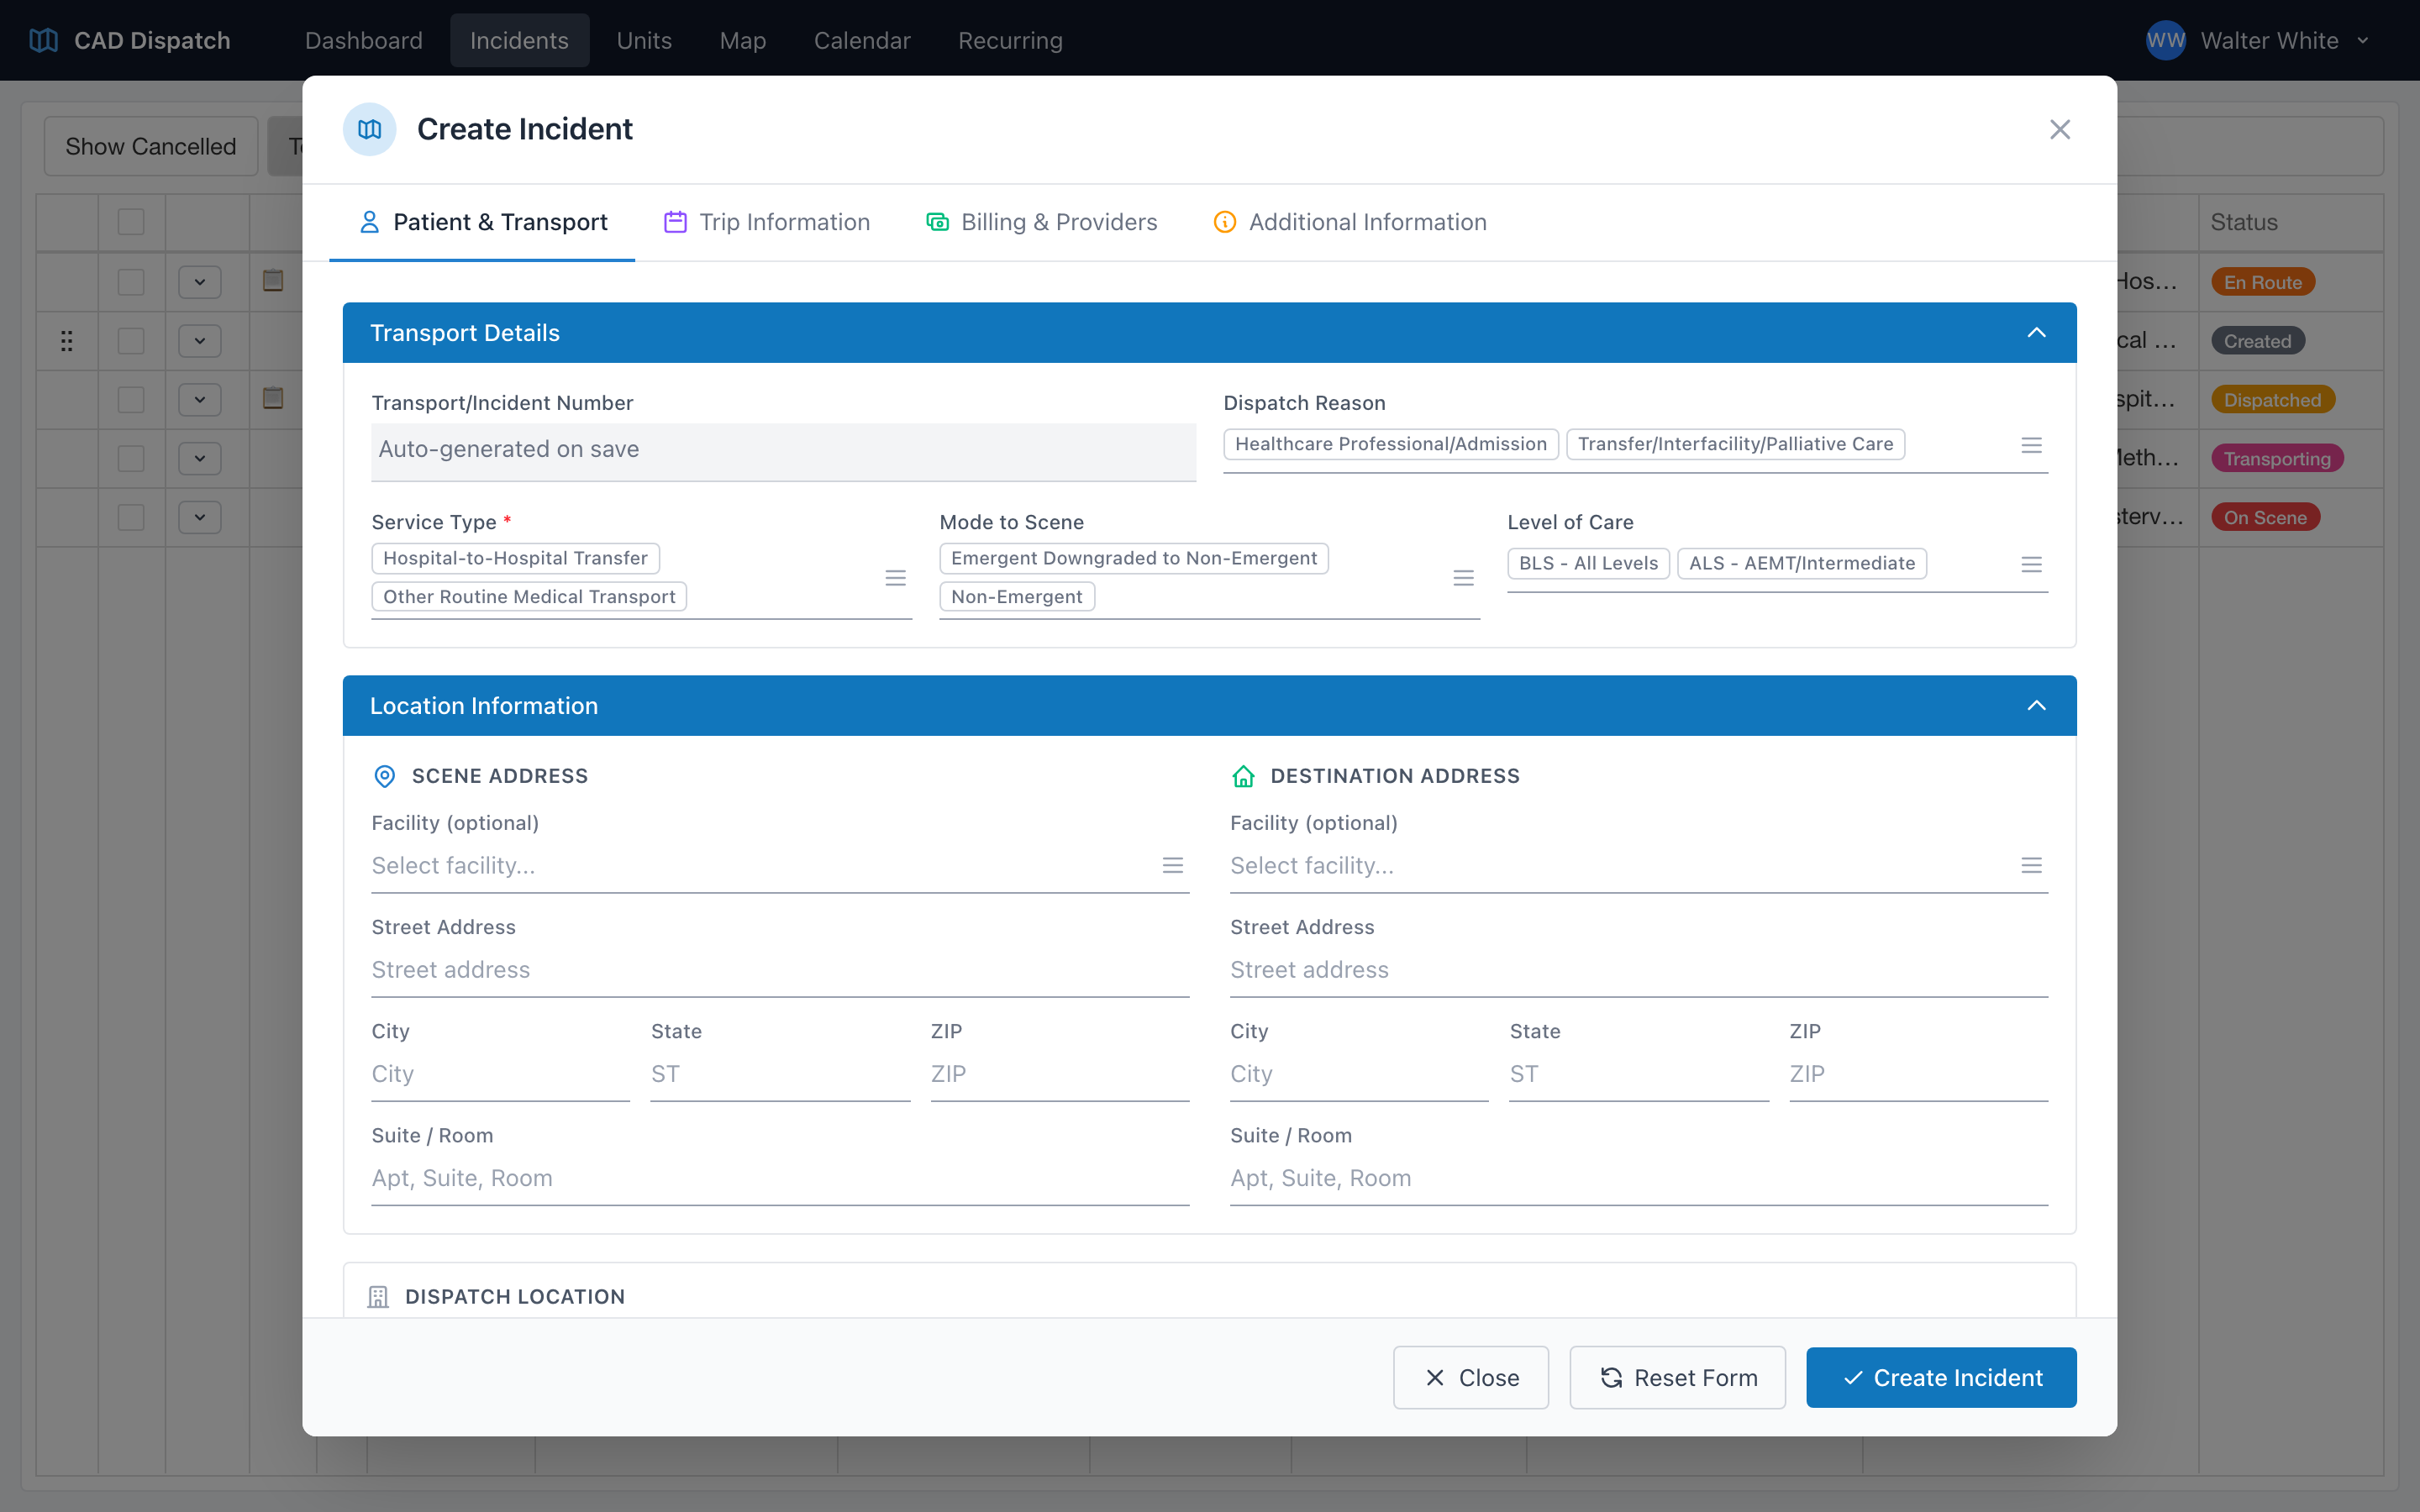
The form has four tabs
The incident form is organized into four tabs, which you fill out top to bottom:
- Patient & Transport — the service type, scene and destination addresses, and patient information.
- Trip Information — scheduled pickup time, trip notes, and the recurring schedule toggle.
- Billing & Providers — transport authorization and provider details.
- Additional Information — anything else your agency captures.
Step by step
- Click + New Incident.
- On the Patient & Transport tab, pick a service type first. This is the most important field on the form — the rest of the form changes based on what you pick.
- Fill in the dispatch reason, mode to scene, and level of care.
- Enter the scene address (where you are picking up) and the destination address (where you are taking them).
- Look up or add the patient (see Adding a patient).
- Move to the Trip Information tab and set the scheduled pickup date and time. Add any trip notes the crew should know.
- Fill in Billing & Providers if your agency captures that at dispatch time.
- Click Create Incident.
The incident appears on the dashboard, ready to assign to a unit.
Tip: Your most-used service types, dispatch reasons, response modes, and levels of care show up as quick-pick buttons at the top of each dropdown — set those up once under Customizing Incident Fields and every incident after that is a one-click pick.