
How the patient directory works
CAD shares its patient directory with CloudPCR, so anyone your agency has transported before is already in the system. You do not need to re-enter their information every time they call.
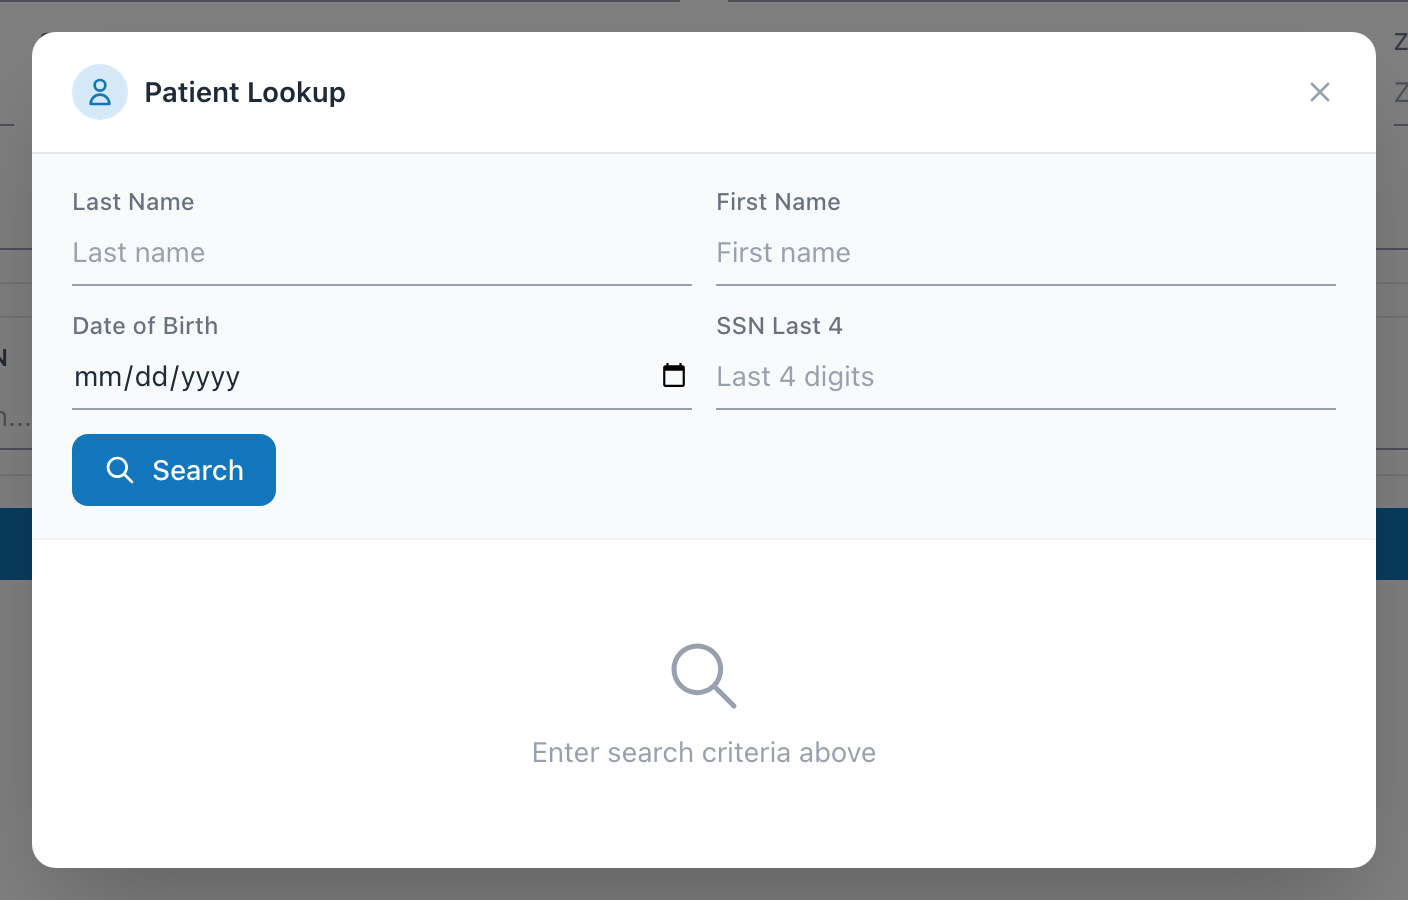
Finding an existing patient
- On the Patient & Transport tab of the incident form, click Add Patient.
- A search window opens. You can search by last name, first name, date of birth, or the last four of their Social Security number.
- You do not need to fill in every field — one is enough. A last name on its own is usually all it takes.
- The more you type, the narrower the results.
- Click the patient's name in the results.
- Their record loads into the form. You do not have to retype anything.
Adding a new patient
If the patient is new to your agency, click Add New Patient from the search window. Fill in:
- First name (required)
- Last name (required)
- Date of birth, sex, phone, and home address
Click Save Patient. They are added to the shared directory and selected for this incident.
Fixing a typo on a patient
If you need to fix something on a patient who is already loaded into an incident, click the small pencil icon next to the patient's name on the form. The patient form opens with their existing information ready to edit. Update what you need and click Update Patient.
Tip: Because the directory is shared with CloudPCR, any patient your crews have documented in CloudPCR is already findable here. You almost never need to create a new patient record.