
Every field in Form Configuration carries a small gear icon next to its eye and asterisk toggles. The gear opens Call type settings, a window that shows how that one field behaves for every call type at once: whether it is hidden, whether it is required, and what value it fills in by default. Instead of picking call types one at a time and walking the form for each, you set up the whole field in one place and save it together.
Before you start: Settings is admin-only. The window needs at least one call type to work with. If it says No call types set up yet, add call types first with the Manage button on the Incident page. See Form Configuration.
Open the window
- From the menu, click Settings, then Form Configuration.
- Find the field on its page.
- Click the gear icon next to the field's toggles.
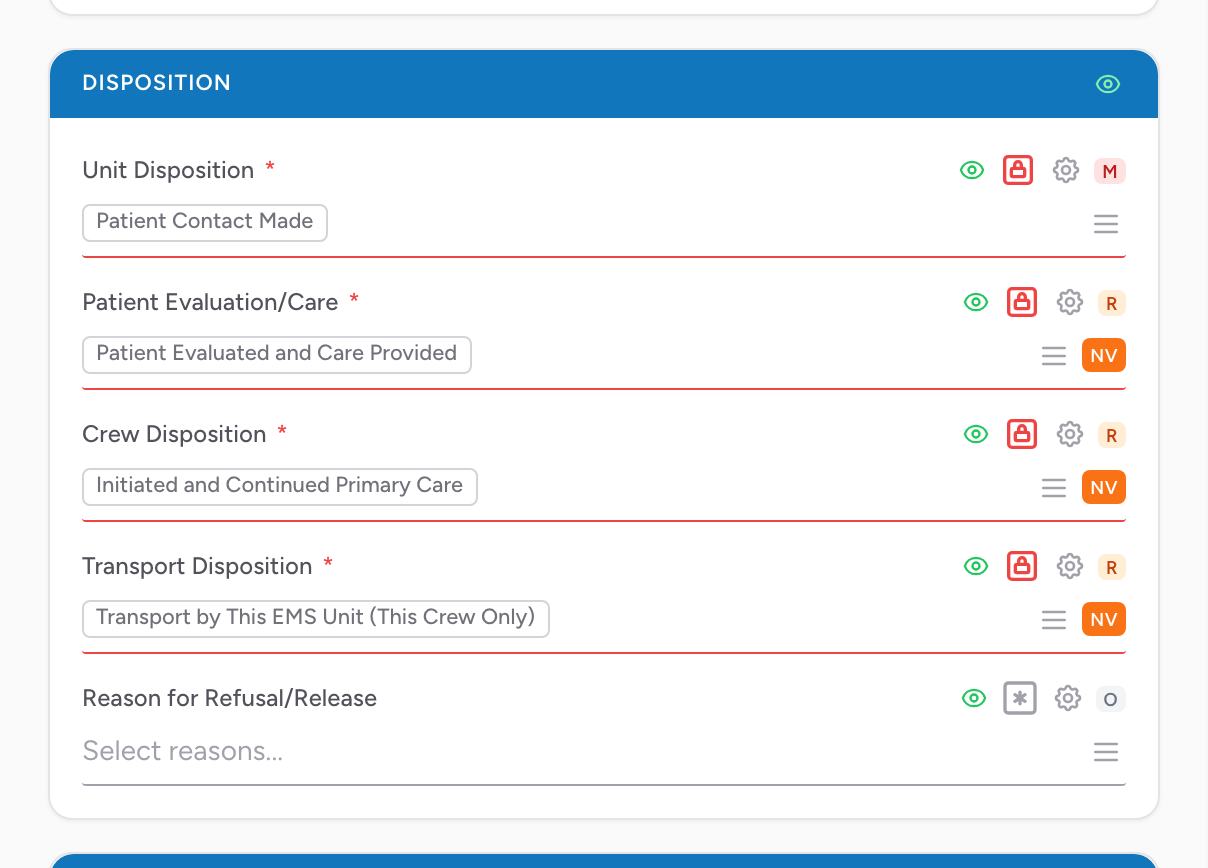
Two sections work a little differently: Medications and Supplements on the Patient page and Signatures have their gear on the section header itself. It controls whether crews must record an entry in that section.
Reading the window
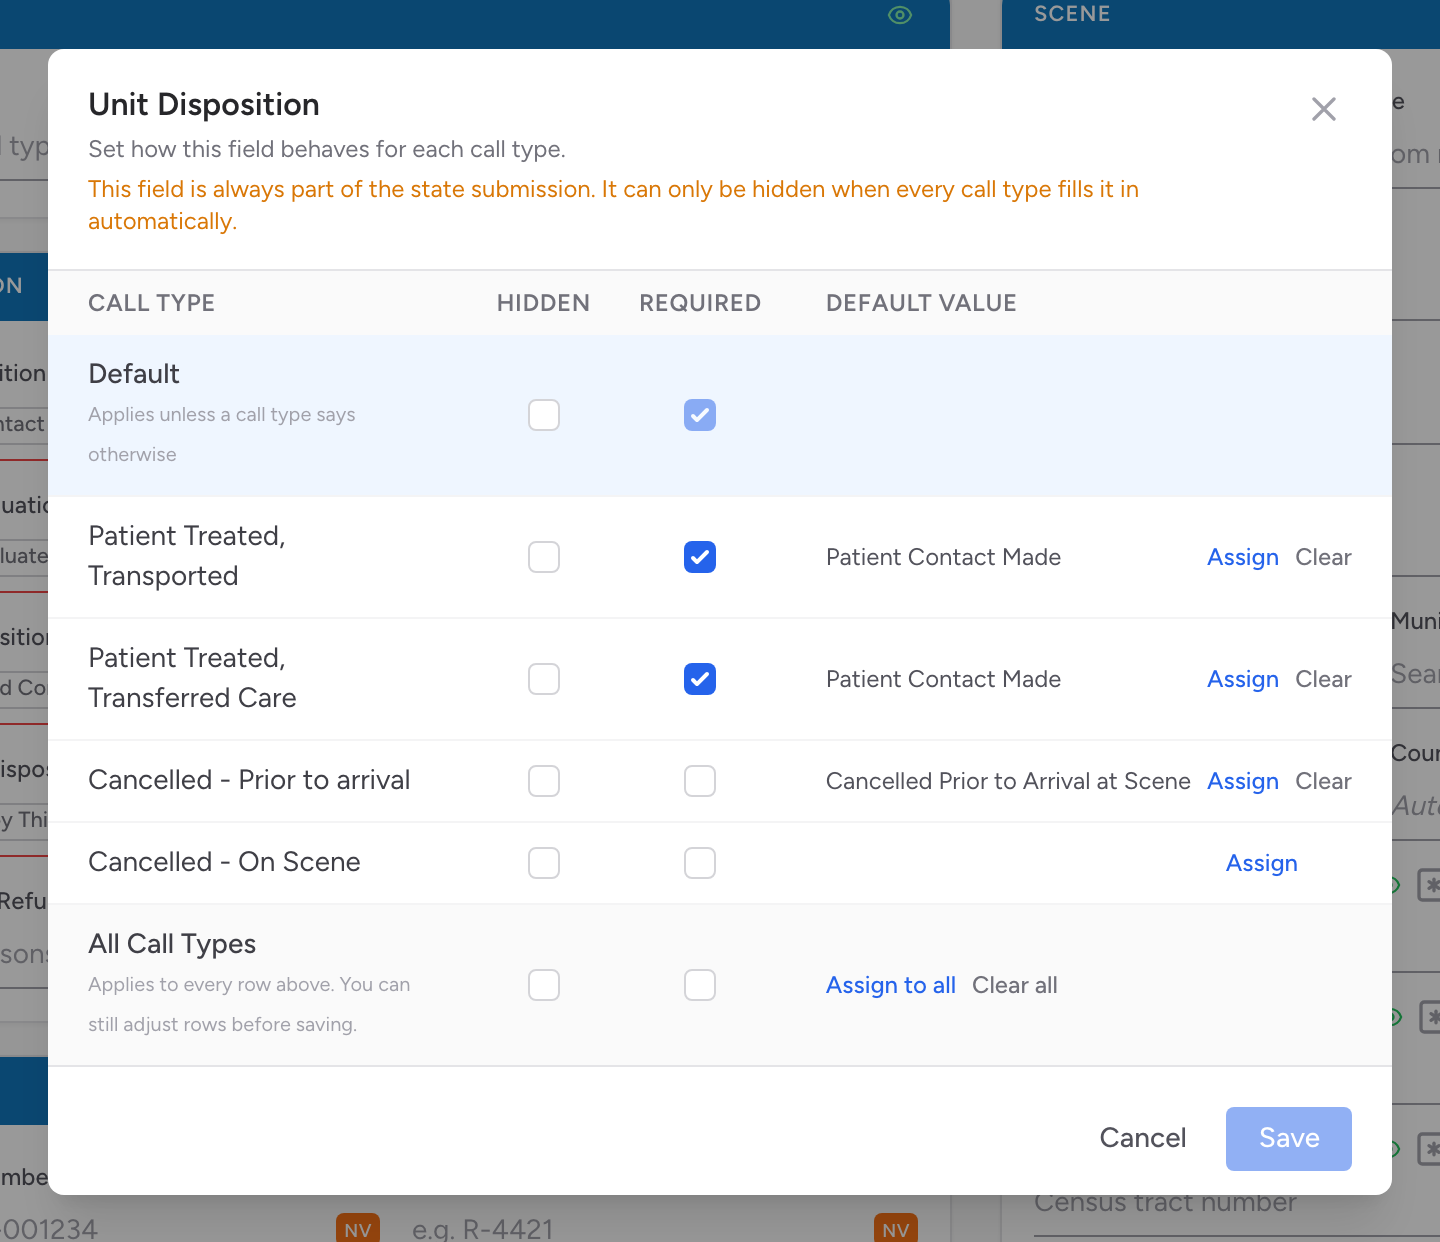
The window is a table with a column for Hidden, one for Required, and one for Default Value. The rows are:
- Default (the first row) is the field's base setting for your agency. It applies unless a call type says otherwise. It is the same setting the eye and asterisk toggles on the page control.
- One row per call type, so you can treat a 911 call differently from a routine transfer.
- All Call Types (the last row) is a shortcut: anything you set on it is applied to every call type row above. You can still adjust individual rows afterward before saving.
Hide or require the field per call type
Check Hidden on a row and charts of that call type will not show the field. Check Required and crews on that call type are pushed to answer it before the chart is complete. Hiding wins: checking Hidden clears the row's Required box, and a hidden row cannot be marked required.
Some Required boxes are already checked and cannot be turned off. Hover one and the tooltip tells you why: Required by your state or Required by the platform. Those requirements sit above your agency's settings.
Set a default value
Defaults are captured from the form itself, so the value is entered exactly the way a crew would enter it:
- Before opening the window, fill in the field on the configuration page with the value you want: pick the dropdown option or type the text.
- Click the field's gear icon.
- On the row for the call type you want, click Assign. The value appears in the Default Value column. To give the value to every call type, click Assign to all on the All Call Types row.
If you click Assign while the field on the page is empty, the window reminds you to enter a value first. To remove a default, click Clear on that row, or Clear all to remove it everywhere. Defaults only fill fields the crew has not touched; they never overwrite something a crew already entered.
Save it all at once
Nothing changes until you click Save. Rows you have changed are tinted so you can see what the save will touch, and Cancel (or closing the window) discards everything. The save applies all your changed rows together.
For fields your state submission can never go without, the window shows a note at the top: the field can only be hidden when every call type fills it in automatically. If your save would hide such a field while any call type still has no default, nothing is applied and a message names the call types that still need a value. Assign them a default and save again.
A worked example
Say a field is answered the same way on every routine transfer, but you want 911 crews to answer it themselves:
- On the configuration page, fill in the field with the transfer answer.
- Click the field's gear icon.
- On your transfer call type's row, click Assign, then check Hidden.
- On your 911 call type's row, check Required.
- Click Save.
Transfer charts now fill the field in automatically and keep it off the crew's screen. 911 charts insist on an answer.
Things to know
- The window edits one field at a time. To reshape a whole call type across many fields, the Call Type picker on the Incident page is still the way to sweep through the form. See Form Configuration.
- Fields that hold several values show their default as a comma-separated list in the Default Value column.
- The Save button stays off until something changes. If it is grayed out, no row differs from what is already saved.