
The Custom Fields page lets your agency add its own fields to the PCR form — things your agency documents that the standard form does not cover, like an internal job number or a witness badge number. Each field you create appears in an Agency Fields section at the bottom of the PCR page you choose, and what crews type is saved with the chart.
Before you start: Settings is admin-only. If you do not see Settings in the menu, your account does not have an admin role.
Open the page
- From the menu, click Settings.
- On the Settings page, click the Custom Fields card.
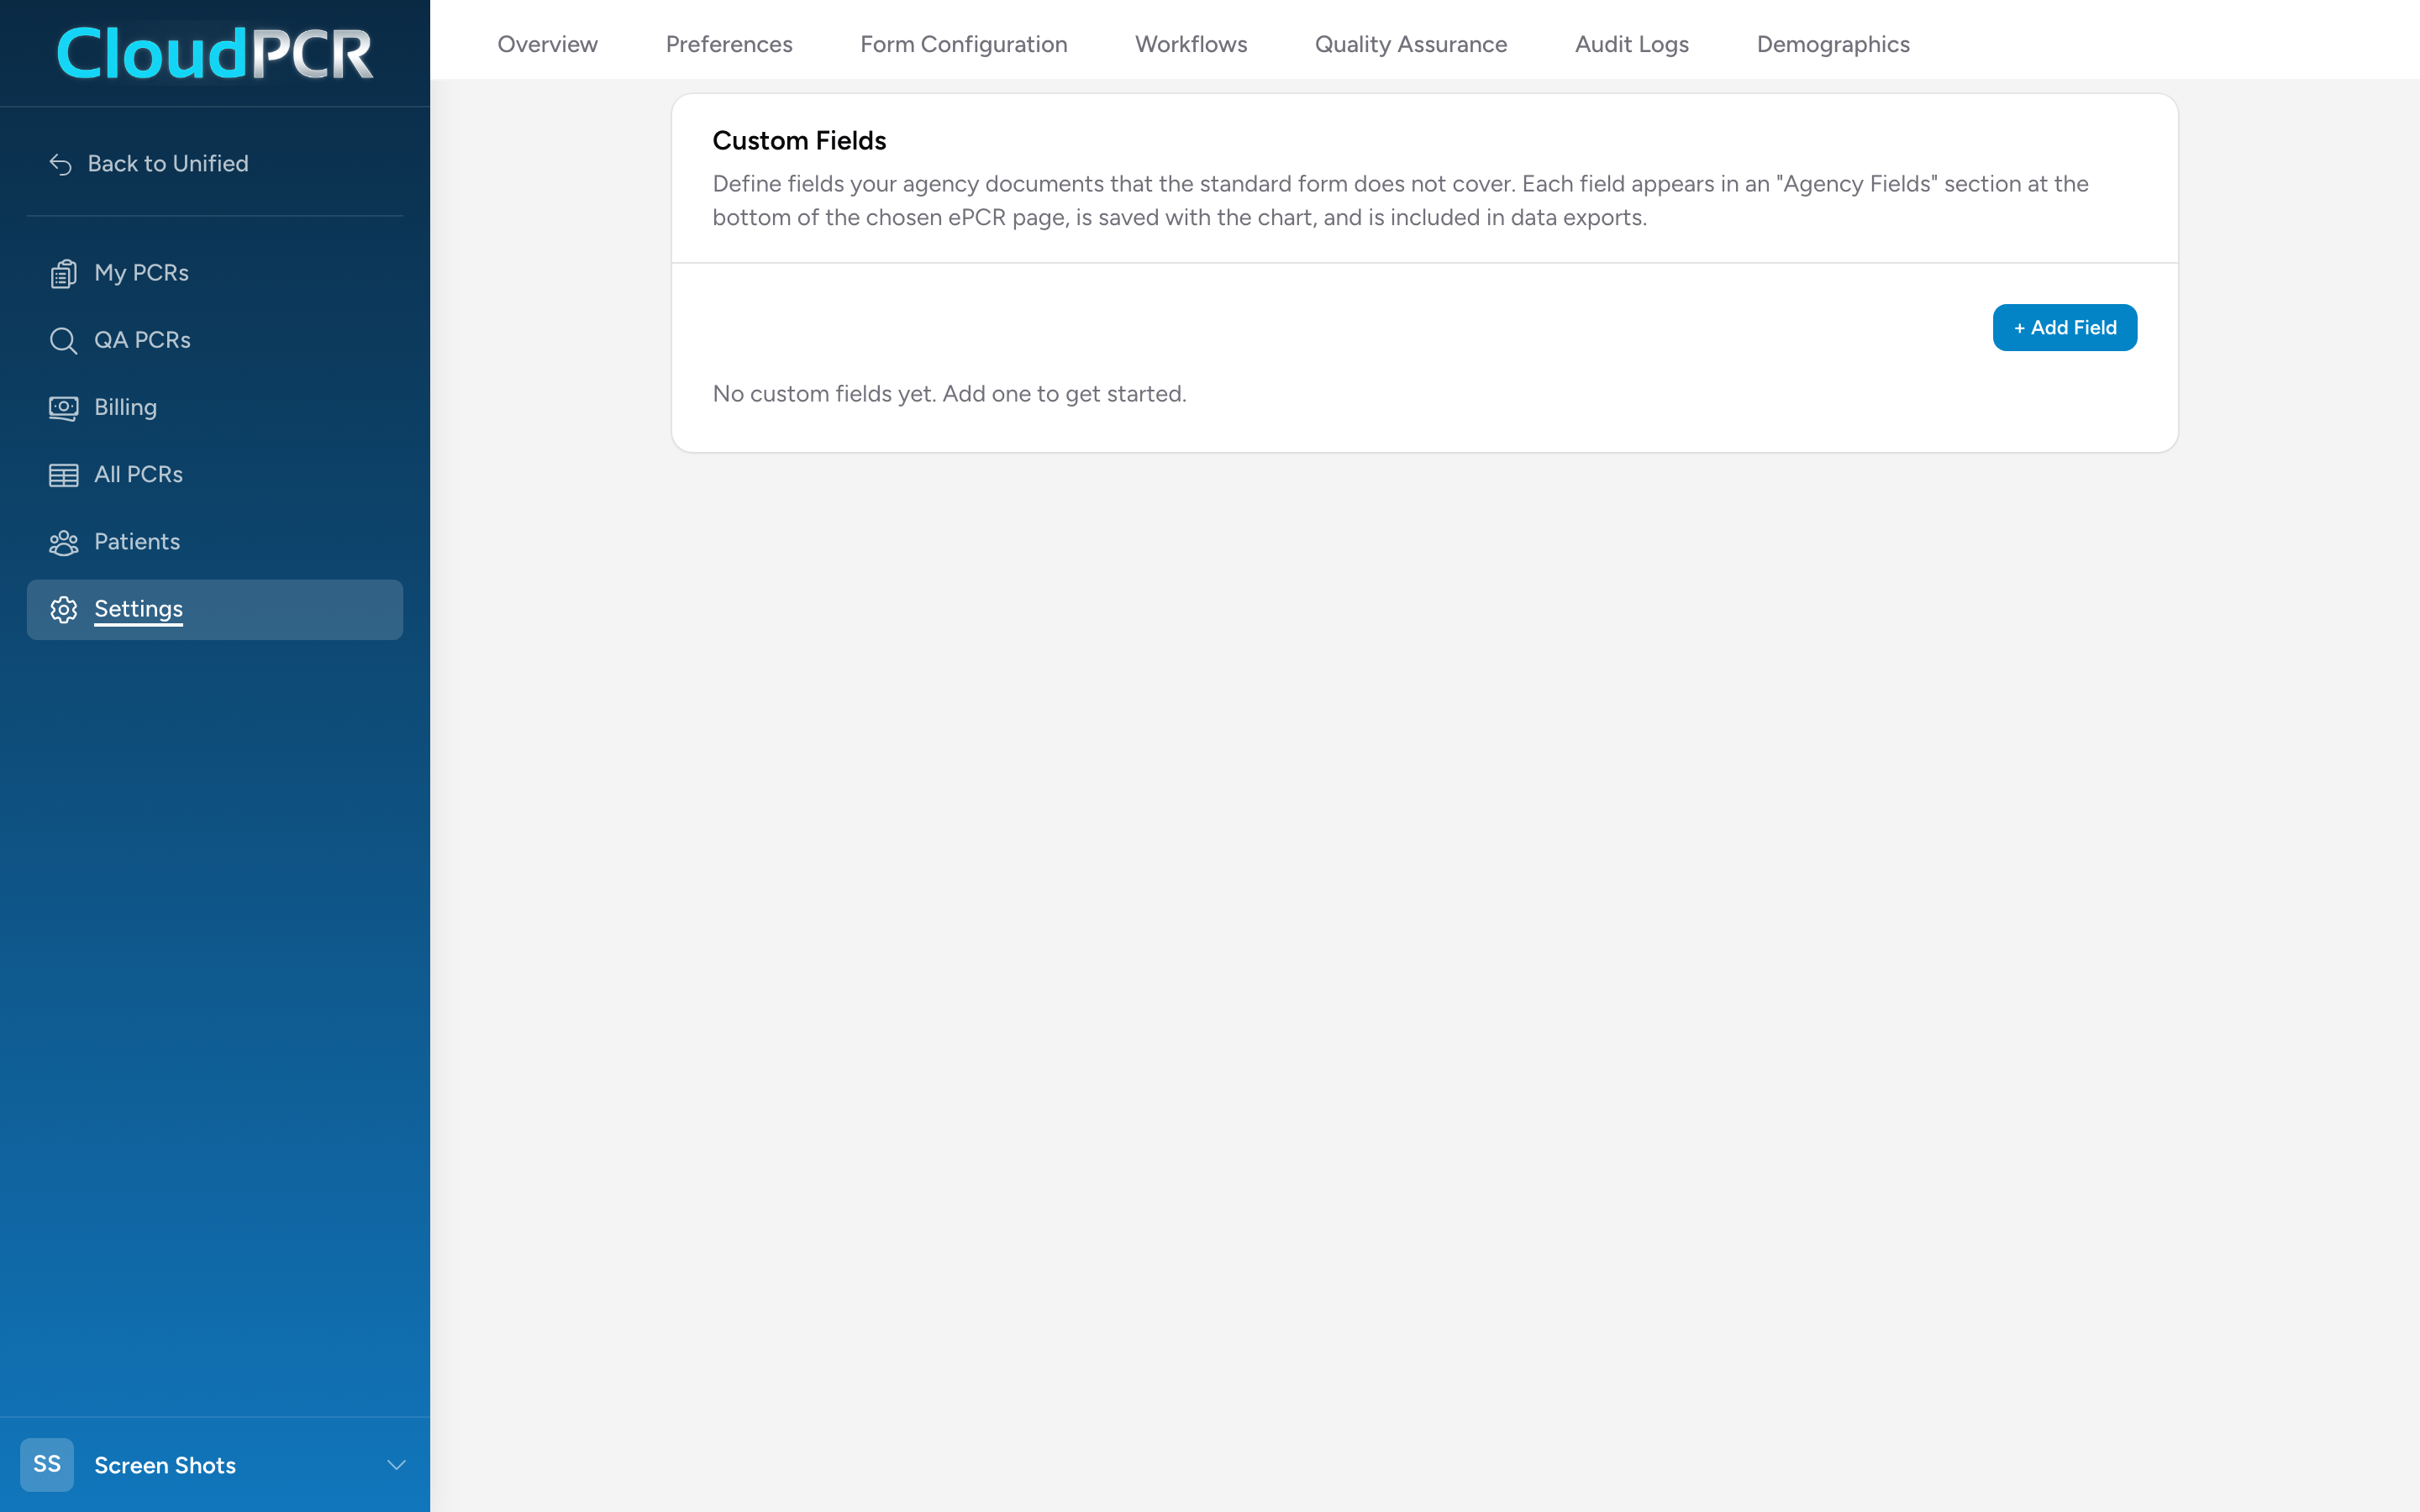
Add a field
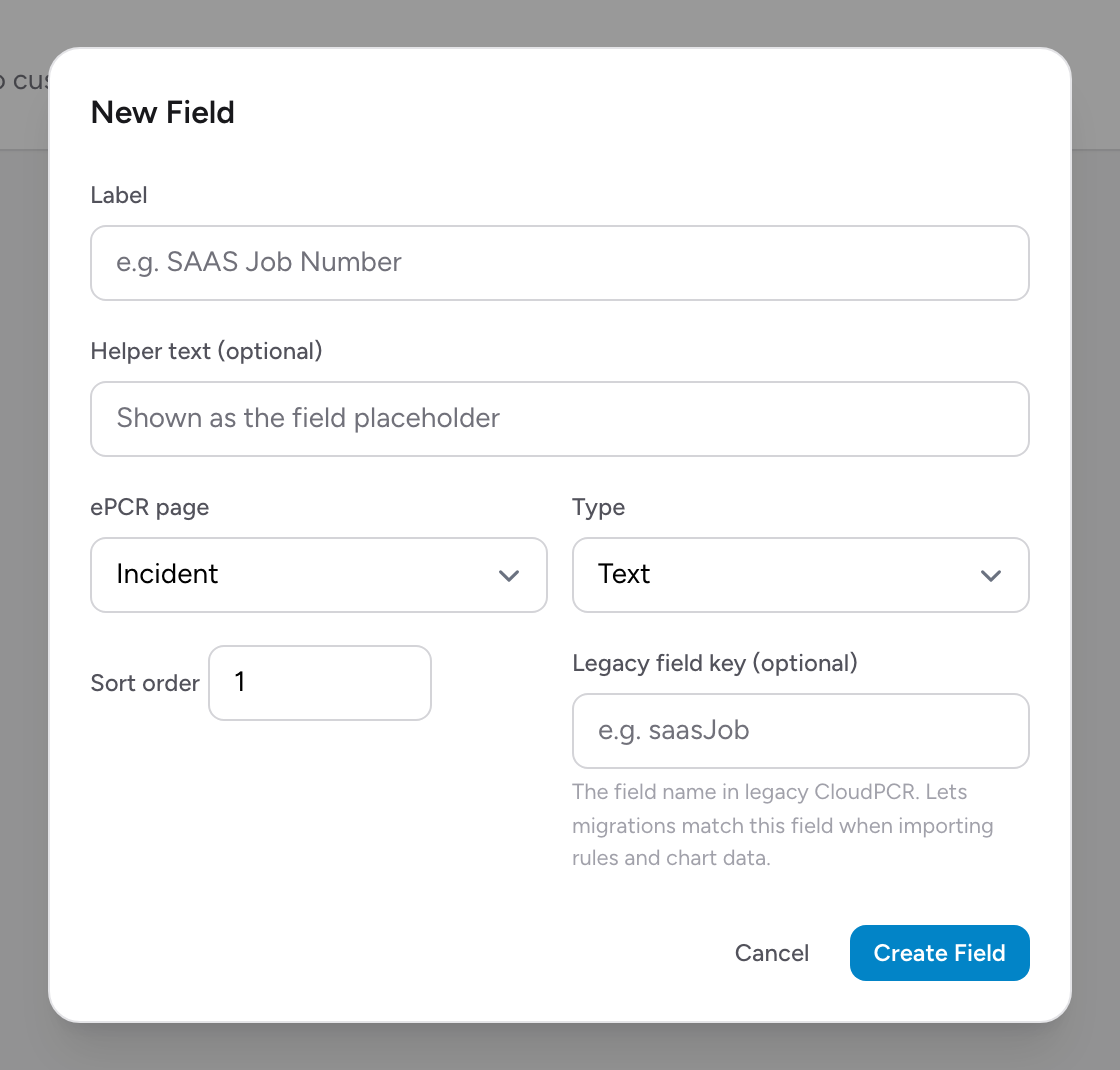
- Click + Add Field. The New Field window opens.
- Enter a Label — the name crews see on the chart, like
SAAS Job Number. - Optionally add Helper text. It shows inside the empty box as a hint.
- Pick the ePCR page the field belongs on: Incident, Patient, Assessment, Billing, or Outcome. Those are the five choices — custom fields cannot go on the Timeline, Narrative, Documents, or Signatures tabs.
- Pick the Type: Text, Long text, Whole number, Decimal number, Date, Time, Date + time, or Dropdown.
- If you picked Dropdown, an Options (one per line) box appears. Type each choice on its own line. At least one option is required.
- Sort order controls where the field sits among your other custom fields on the same page — lower numbers come first. It is pre-filled for you.
- Leave Legacy field key blank unless your agency migrated from the previous CloudPCR and Unified Solutions asked you to fill it in — it matches this field to data imported from the old system.
- Click Create Field.
To change a field later, click Edit on its row and then Save Changes. Renaming a field is safe — answers already recorded on charts stay attached to it.
Where crews see it
On the page you picked, an Agency Fields section appears at the bottom of the left column of the PCR — but only once your agency has at least one custom field on that page. Crews fill it in like any other field, and it saves automatically like the rest of the chart. Custom fields show on every call type; you cannot limit one to certain call types.
Where the answers go
- The chart. Values save with the PCR and reload when it is reopened.
- The PDF. Filled-in custom fields print on the chart PDF under a section headed Custom Fields. Empty ones are left off.
- Analytics. Each custom field shows up as a column in the Analytics report builder. You can include it in report output, but you cannot filter, sort, or group by it.
- Not your state submission. Custom fields are your agency's own — they are deliberately left out of the NEMSIS data sent to your state, because states reject charts that carry fields they have not approved.
Deleting a field
Important: Deleting a custom field also deletes every answer crews have recorded in it, on every chart. If you might need the data later, leave the field in place. There is no way to hide or retire a field without deleting it.
A worked example
Your agency wants to record the badge number of the police officer who witnessed a refusal.
- Click + Add Field.
- Label:
Refusal witness badge number. Helper text:Badge number of the witnessing officer. - ePCR page: Outcome — that is where crews are working when they close out a refusal.
- Type: Text. Badge numbers can carry letters or leading zeros, so avoid Whole number here.
- Click Create Field.
From the next chart on, the Outcome tab shows an Agency Fields section with the new box. The value prints on the PDF and appears as a column in Analytics.
Things to know
- Custom fields are always optional for crews. You cannot make one required, and submission validation never checks them.
- Long text currently shows as a single-line box on the chart, the same as Text.
- Dropdown options keep their identity by name — you can reorder them freely, and recorded answers still match.
- Before adding a field, check whether the standard form already covers it — see Form Configuration. A standard field is better: it validates, exports to your state, and reports cleanly.