CloudPCR integrates directly with Stryker LIFENET, so 12-leads, vitals trends, defibrillation events, and device-generated PDF reports from your LIFEPAK monitors flow straight into CloudPCR and are available to import onto each PCR. Setting this up is a two-step admin process.
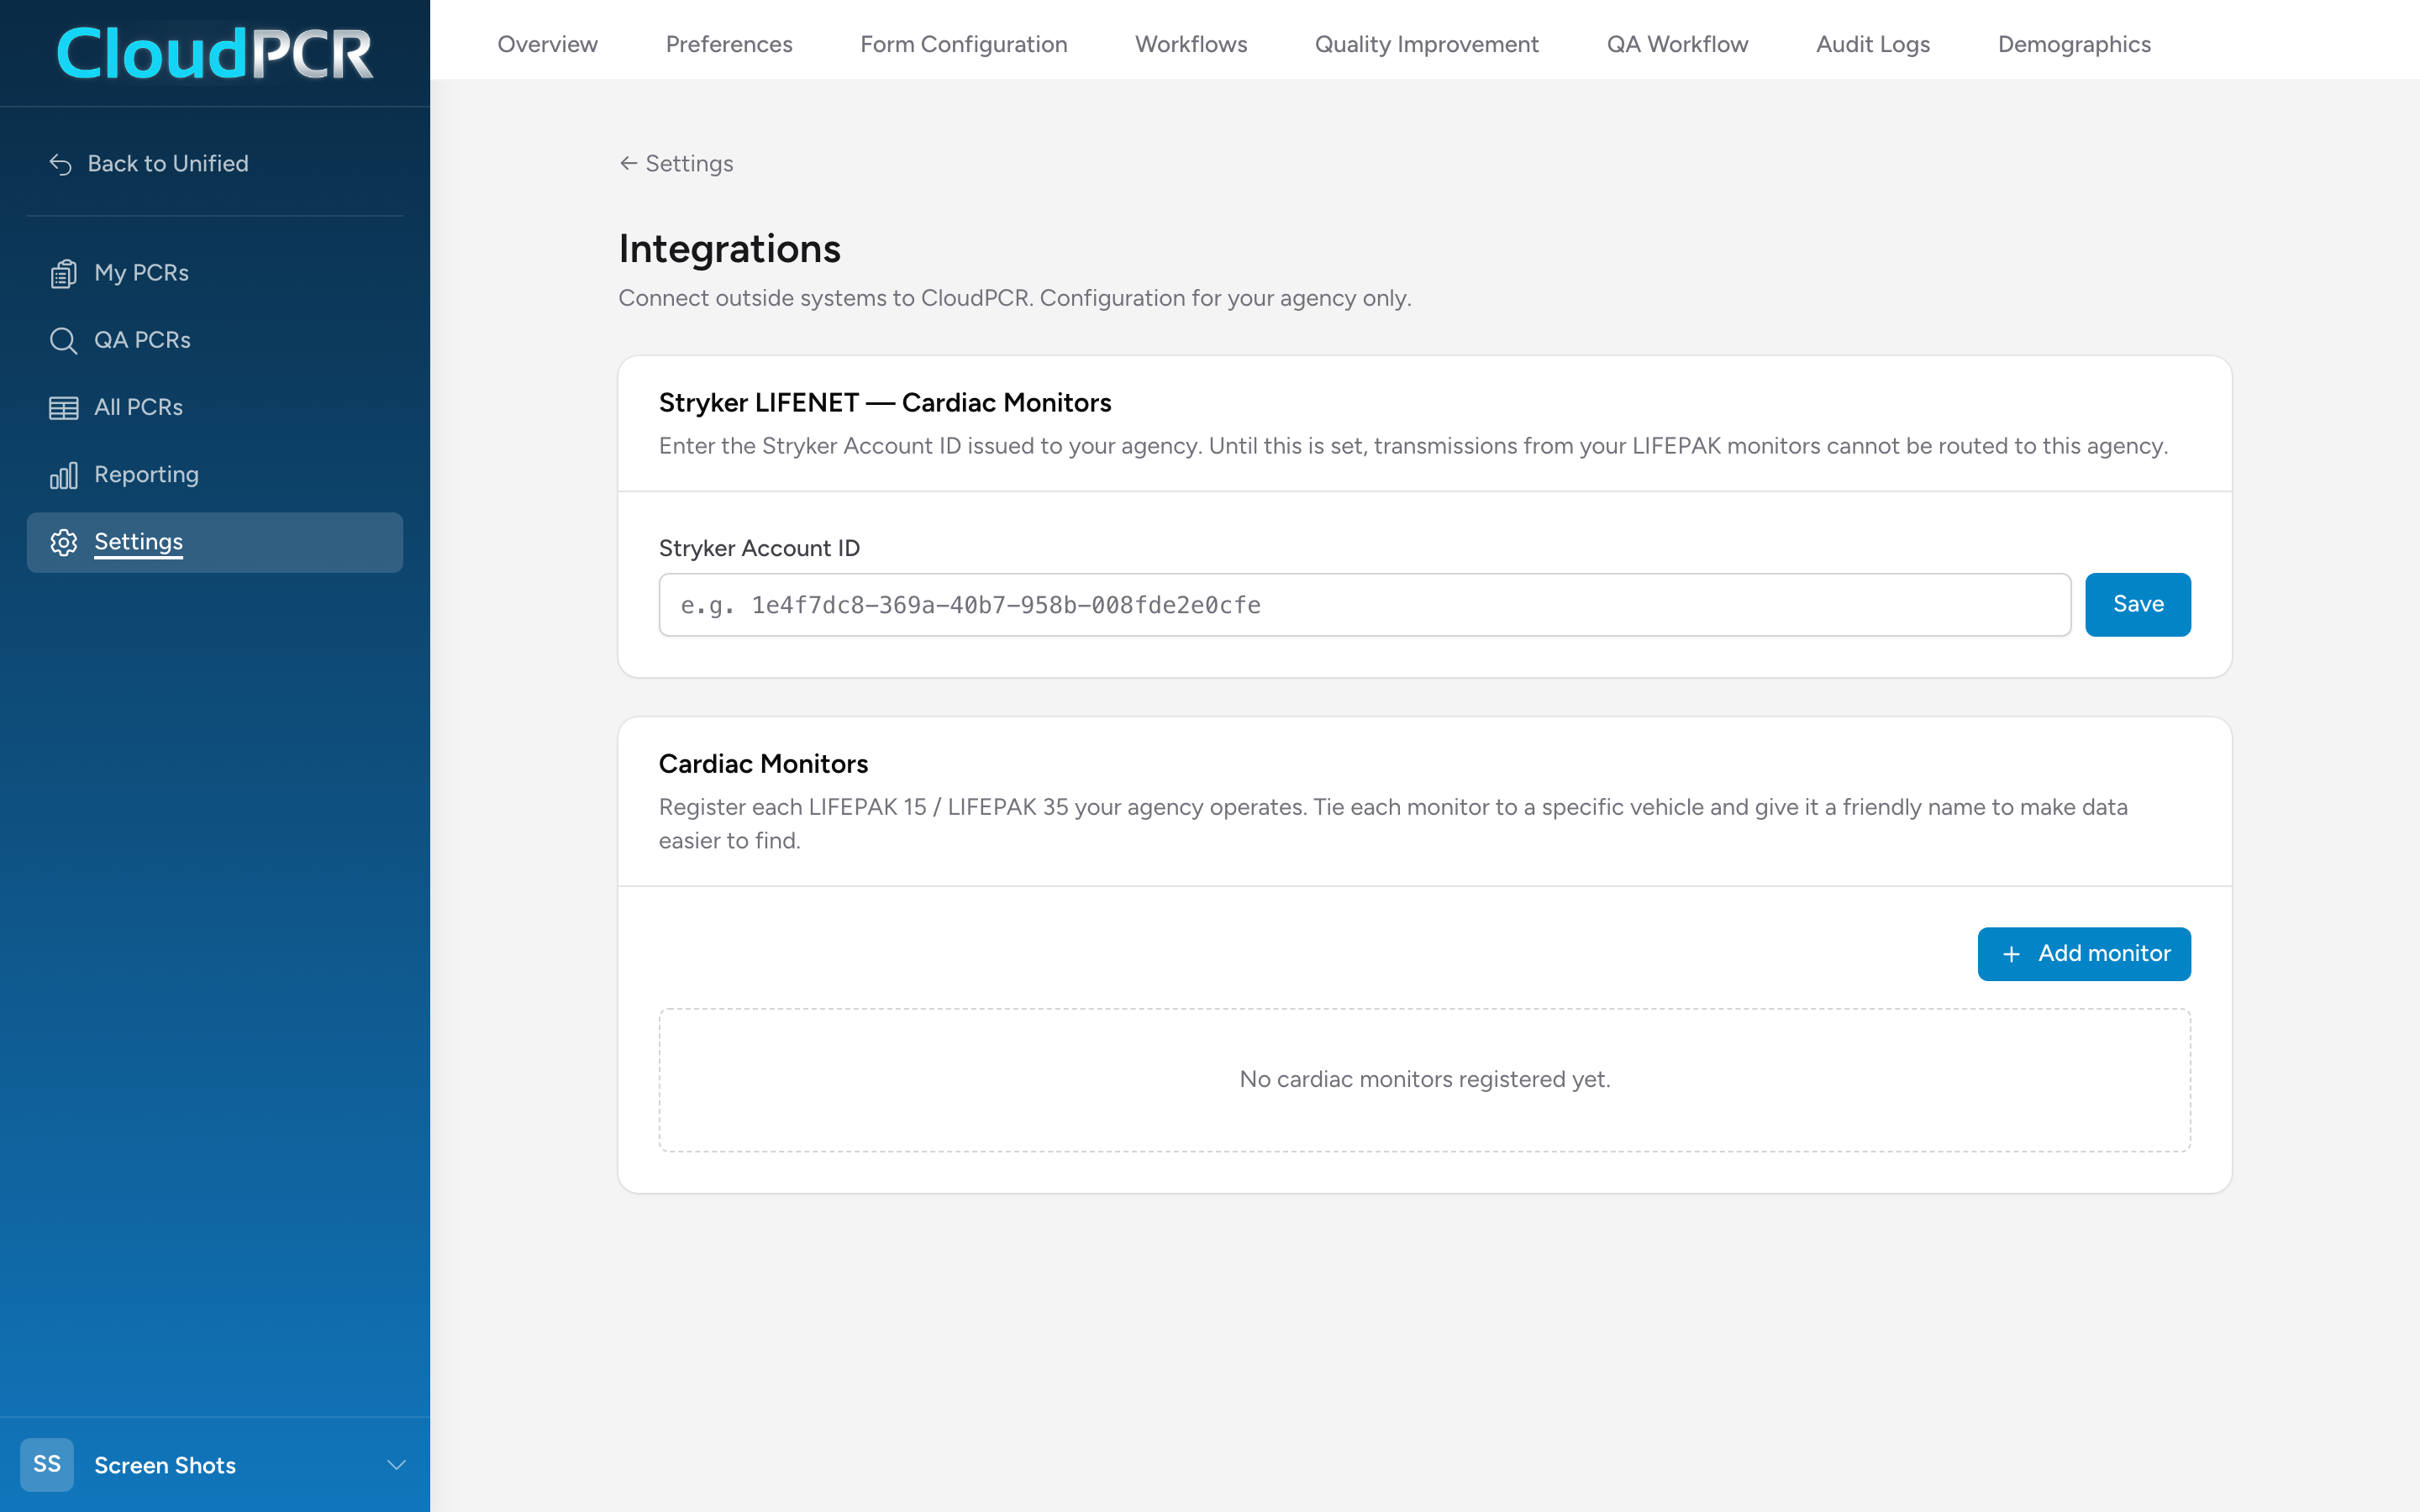
Open the Integrations page
- From the navigation, click Settings.
- Click Integrations.
You will see two sections: Stryker LIFENET — Cardiac Monitors at the top and Cardiac Monitors below it.
Step 1 — Enter your Stryker Account ID
Stryker issues every LIFENET customer a unique account ID. Until it is entered here, transmissions from your monitors cannot be routed to your agency.
- Paste the account ID into the Stryker Account ID field.
- Click Save.
If you do not know your account ID, ask your Stryker LIFENET administrator or your Unified Solutions support contact.
Step 2 — Register each monitor
Every LIFEPAK 15 or LIFEPAK 35 your agency operates needs to be registered here so CloudPCR can match incoming transmissions to the right vehicle and the right crew.
- Click Add monitor. The Add cardiac monitor modal opens.
- Fill in the fields (see below).
- Click Add monitor at the bottom of the modal to save.
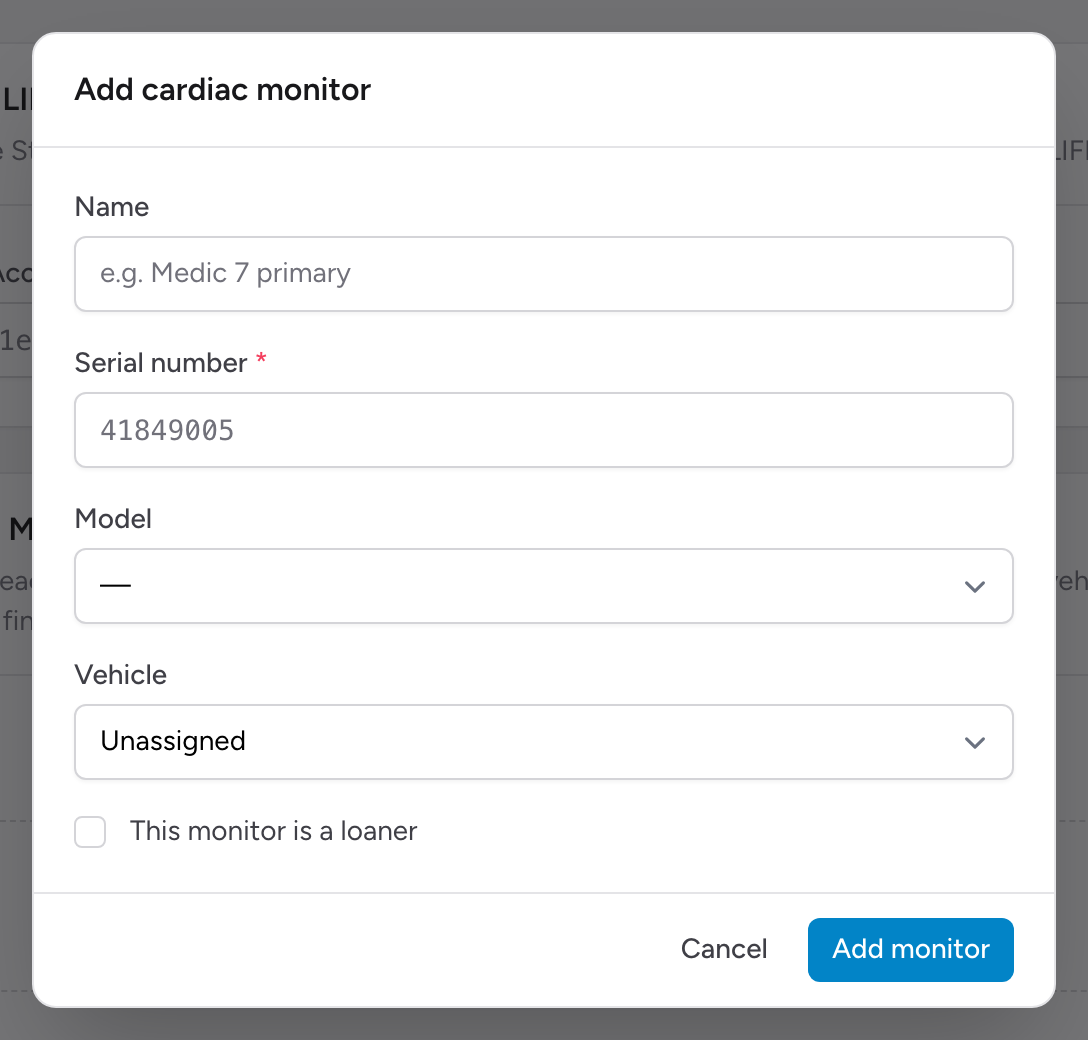
The fields
- Name — a friendly name you and your crews will recognize (for example, Medic 7 primary).
- Serial number (required) — the serial number printed on the monitor. This is how Stryker identifies the device in every transmission.
- Model — LIFEPAK 15 or LIFEPAK 35.
- Vehicle — pick from your agency's vehicle list. If the monitor floats between units, leave it Unassigned.
- This monitor is a loaner — check this if the monitor is a short-term replacement you do not want mixed in with your regular fleet reports.
The Cardiac Monitors table
Every monitor you register appears in the table below with Name, Serial, Model, Vehicle, Loaner status, and Last seen (the last time a transmission arrived). Each row has Edit and Remove actions.
What comes next
Once the account ID is saved and at least one monitor is registered, your crews can import monitor data onto any PCR. See Importing cardiac monitor data for the crew-facing workflow.
Important: Until both the account ID is saved and at least one monitor is registered, the Import button on the PCR Timeline tab stays disabled. Do both before your crews try to import data.