Once you have a Workspace configured the way you want it, save it so you do not have to rebuild it next time. Saved reports live on their own page — separate from the Builder — so you can come back to a layout, schedule it, run it, or hand it off to a teammate without rebuilding from scratch.
Saving from the Workspace
- From the Workspace, click Save in the top right.
- A dialog appears. Enter a Name (required) and an optional Description.
- Tick Share with everyone in this company if you want every Analytics user at your agency to see this report. Leave it unticked to keep it private to you.
- Click Save. You land on the report's edit URL, ready to keep tweaking.
Private vs public
- Private (default) — only you see this report.
- Public — every Analytics user at your agency sees this report on their Saved Reports page. Only you, the owner, can edit or delete it. Other users can clone it with Save as new to make their own version.
The Saved Reports page shows the visibility right on the row so you can tell at a glance — green Public or gray Private.
Updating a saved report
From the Saved Reports page, click the report name (or the Open action) to come back into the Workspace. Change anything — date range, columns, charts — then click Save. You get two options when you own the report:
- Update — overwrites the current saved report with your changes.
- Save as new — creates a new saved report, leaves the original alone.
Use Save as new when you are exploring a variation and want to keep the original intact. If you are looking at someone else's public report, you only get Save as new — the original belongs to them.
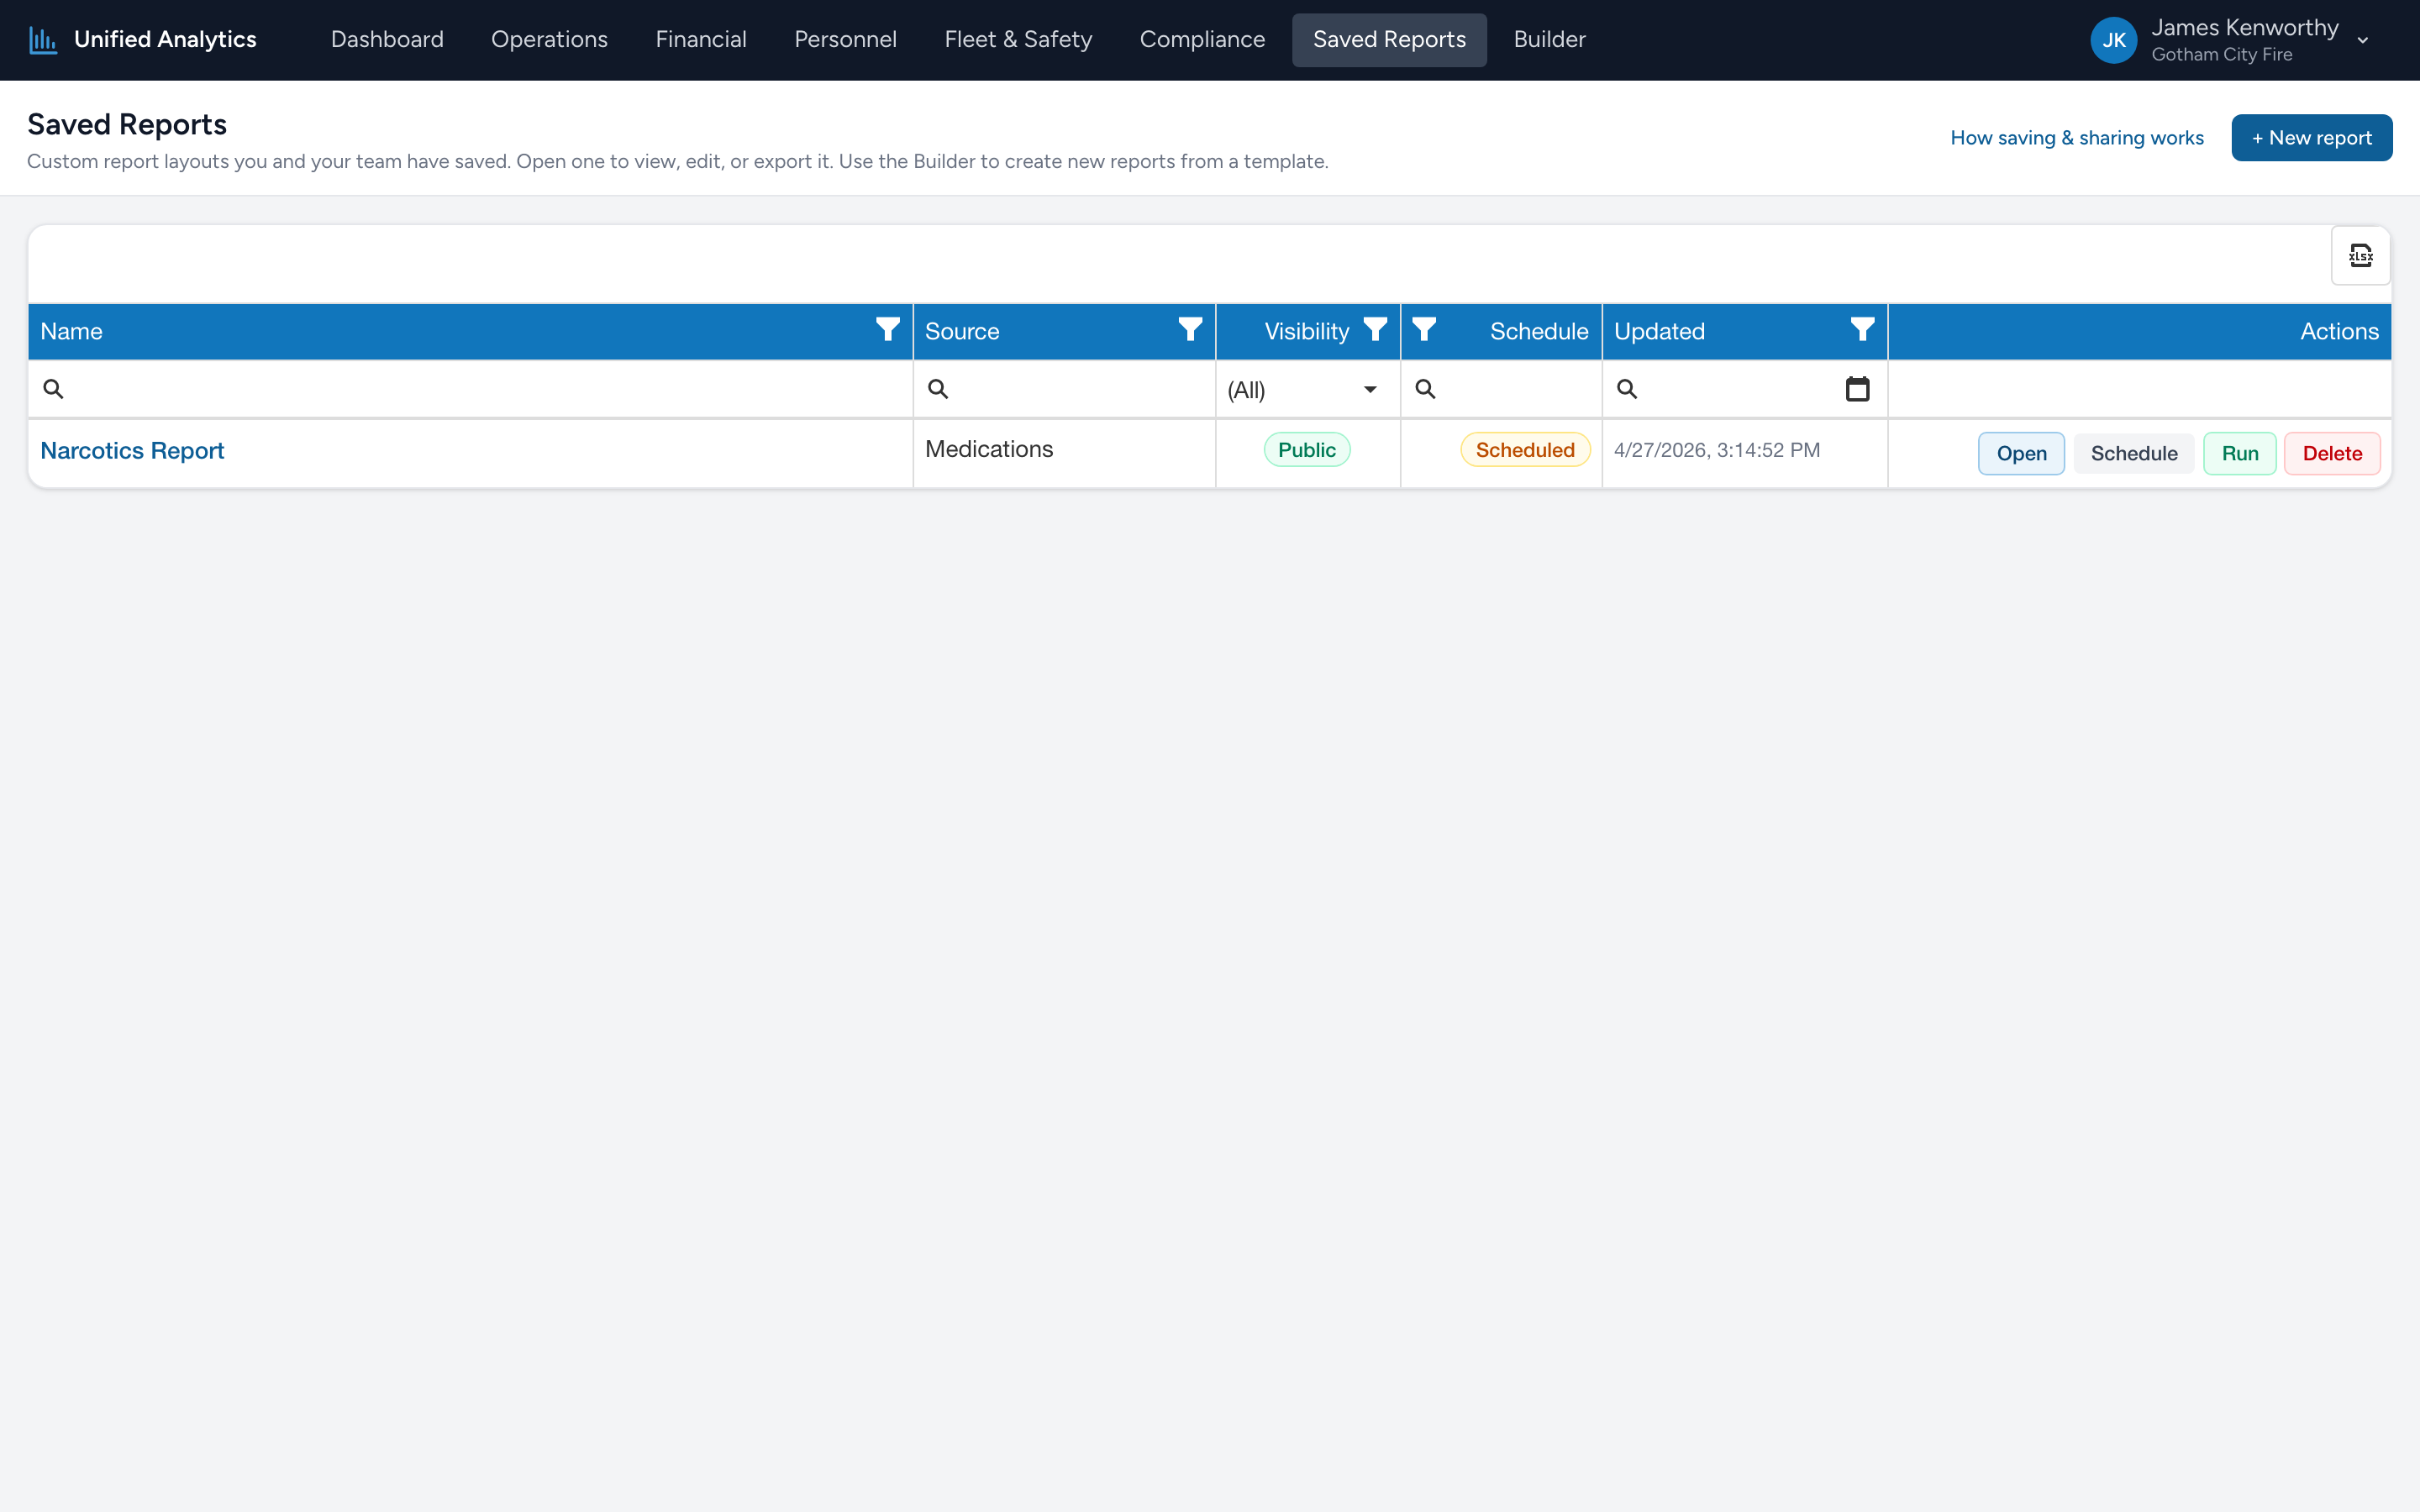
The Saved Reports page
From the menu, click Saved Reports. The page is a table of every report you and your teammates have saved at this agency. Each row has six columns:
- Name — click to open the report in the Workspace. The description, if any, shows under the name.
- Source — which data source the report pulls from (PCR Reports, Medications, Procedures).
- Visibility — Public or Private.
- Schedule — Scheduled or Not scheduled. Tells you whether this report is set up to email or text on a recurring basis.
- Updated — when the layout was last saved.
- Actions — one or more buttons described below.
The toolbar at the top right has a + New report button that takes you to the Builder.
Row actions
Each row has up to four buttons in the Actions column:
- Open — comes back into the Workspace with this report loaded. Same as clicking the name.
- Schedule — opens the schedule dialog so you can set up a recurring delivery for this report. See Creating a scheduled report for the dialog walkthrough. After saving a schedule, the row's Schedule column flips to Scheduled and the Run button becomes active.
- Run — sends the latest version of the report to the schedule's recipients immediately. Disabled until a schedule has been set up. Hovering when disabled shows the hint Create a schedule first to enable Run.
- Delete — removes the report. Only the owner sees this button. You are prompted to confirm by name before the report is deleted.
The empty state
Before anyone at your agency has saved a report, the Saved Reports page shows a friendly empty state with an Open Builder button. As soon as someone saves a public report, every other Analytics user sees it appear here on their next visit.