When you open Truck Checks, you land on the truck check workflow. The first step is to pick the vehicle you are checking today.
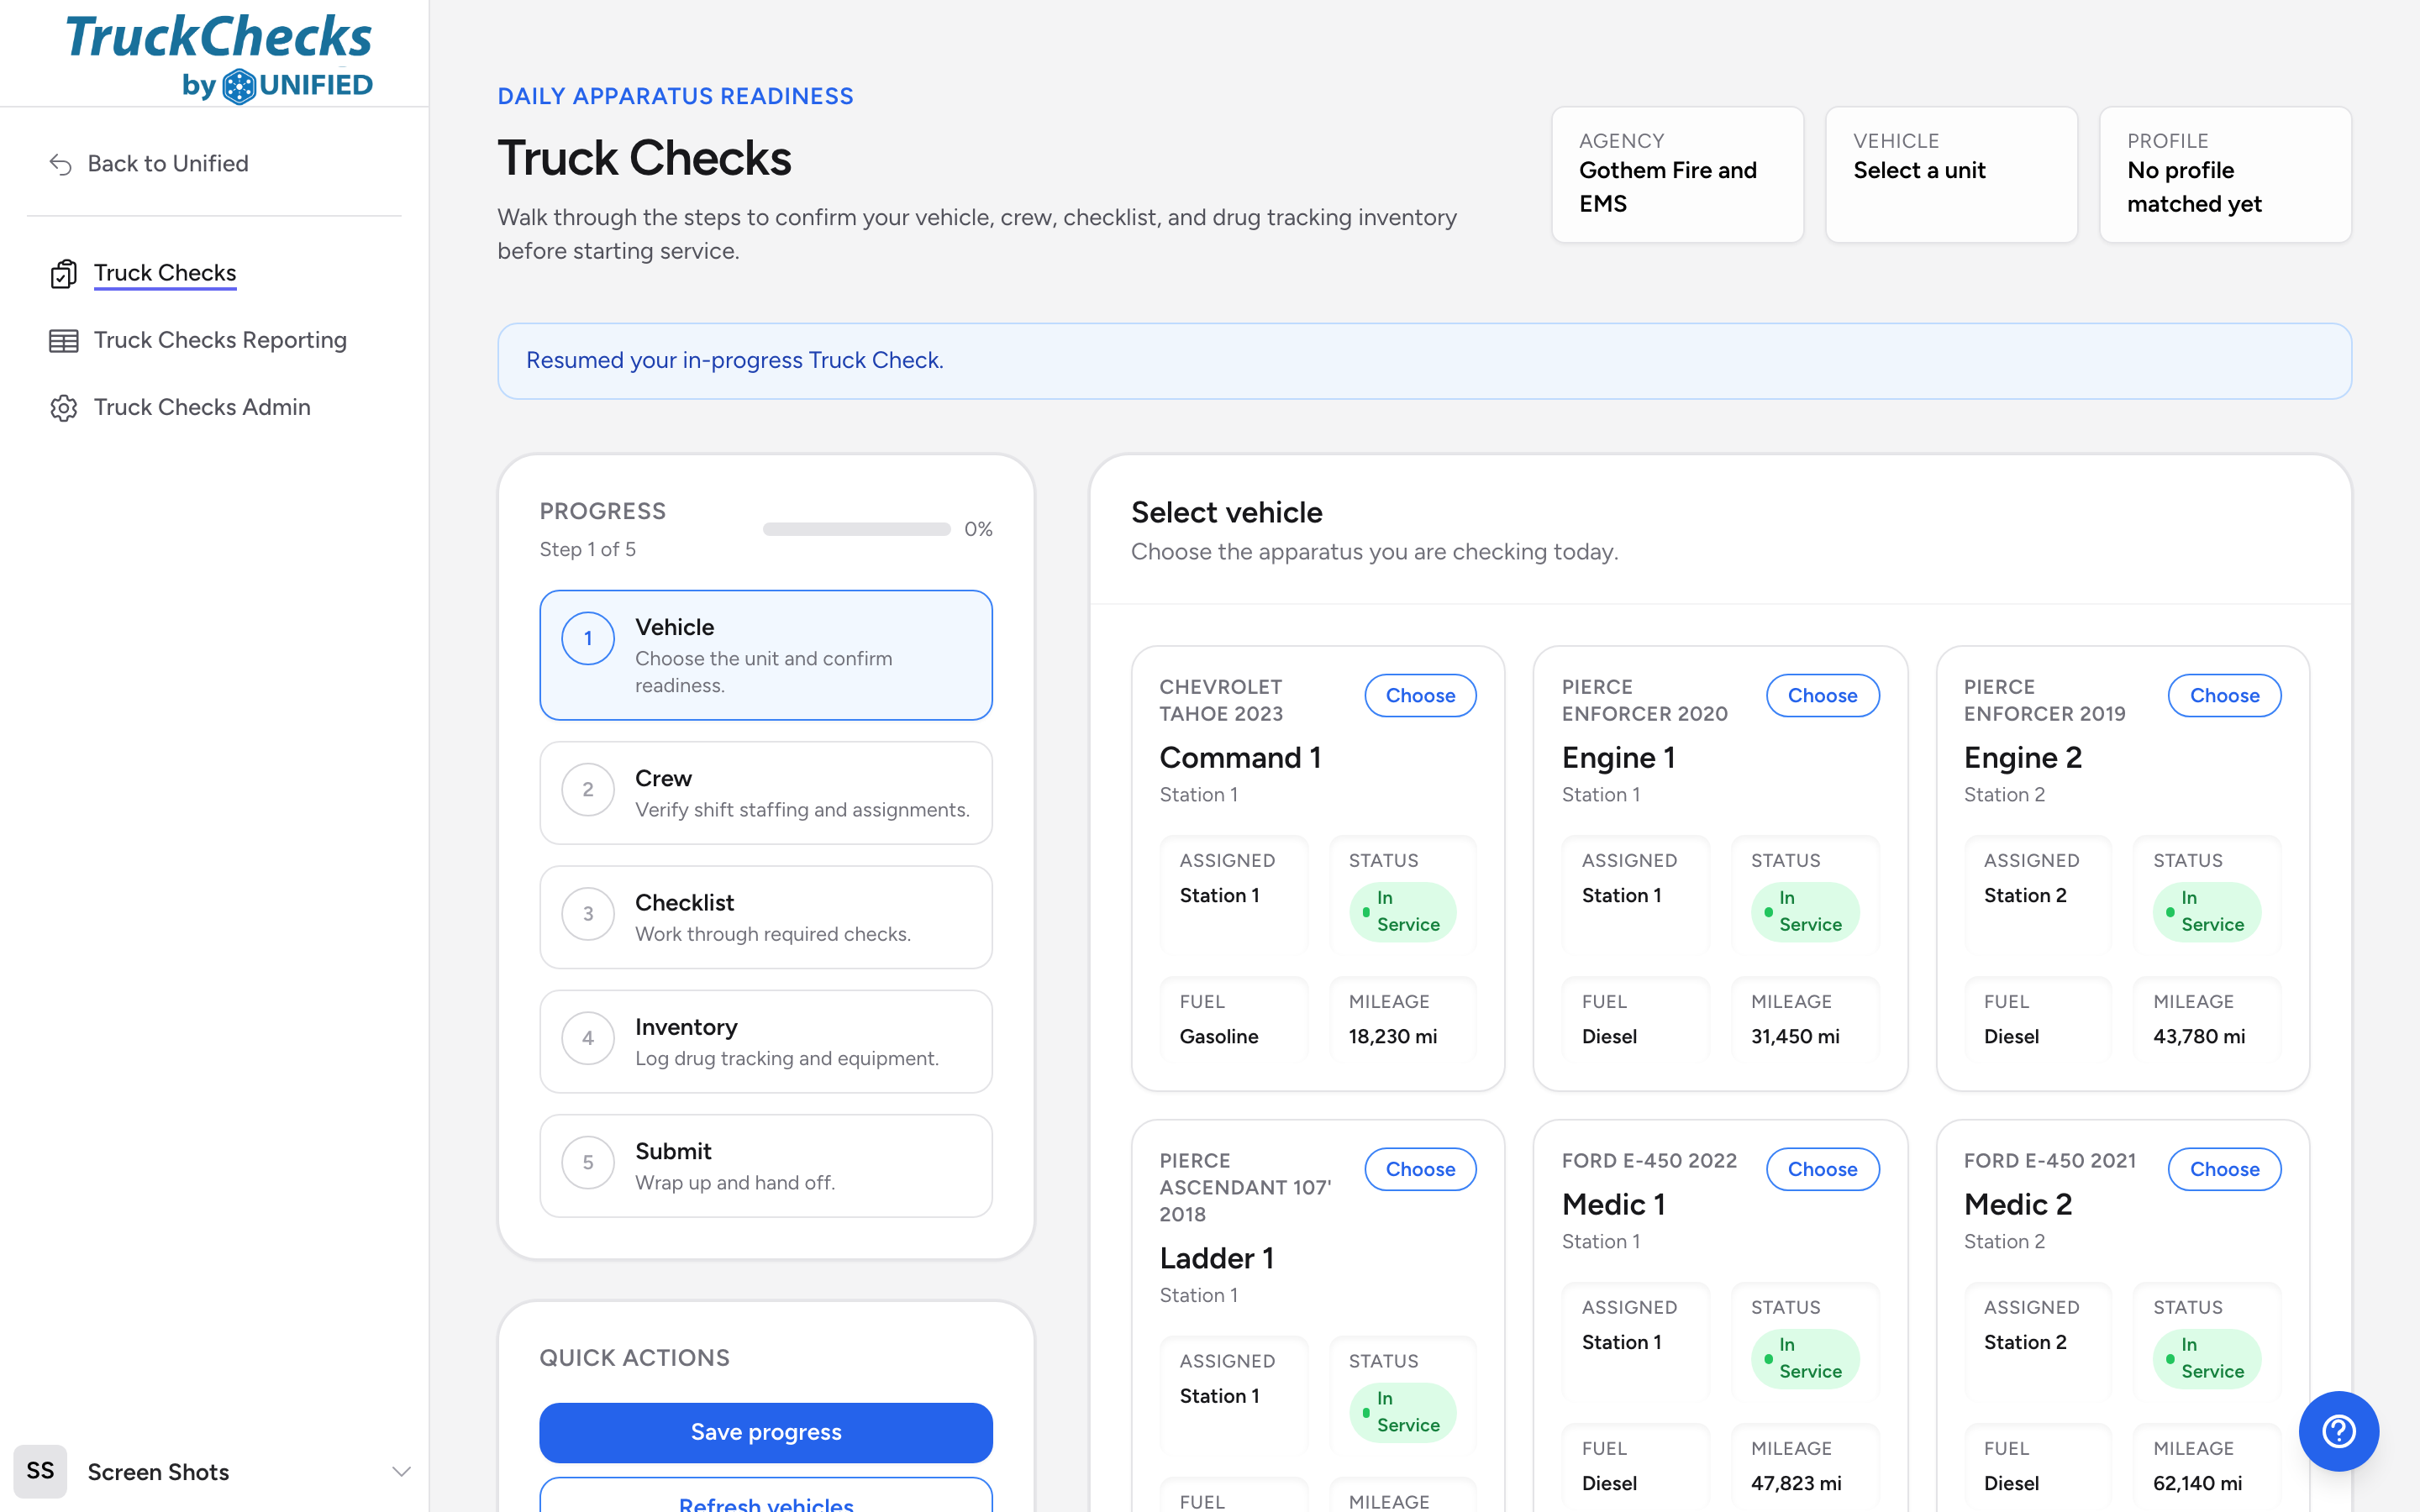
Select a vehicle
- Look at the vehicle cards on the screen. Each card shows the unit number, vehicle type, station, status, fuel type, and last recorded mileage.
- Click the card for the vehicle you want to check. The card highlights and a Selected badge appears.
- Below the vehicle list, you will see the vehicle's details: status, type, station, and last recorded mileage.
Record the odometer
After selecting a vehicle, you will see an odometer entry area. Type in the current mileage reading from the vehicle. This reading syncs back to Fleet Management when you submit the check, so make sure it is accurate.
Profile matching
Once you pick a vehicle, the app matches it to a truck check profile. The profile name appears at the bottom of the vehicle section. This profile controls which checklist and inventory workflow you will work through. You do not need to do anything here -- it happens automatically.
Continue to the next step
Click Continue to crew to move on. You cannot continue until you have selected a vehicle.
Refreshing the vehicle list
If a vehicle was just added to Fleet Management and does not appear, click Refresh vehicles in the Quick actions panel on the left side of the screen. This pulls the latest vehicle list from Fleet Management.