What this step covers
The Units & Response step records every unit that responded to the incident. Each unit gets its own card with staffing, response mode, and a row of time fields.
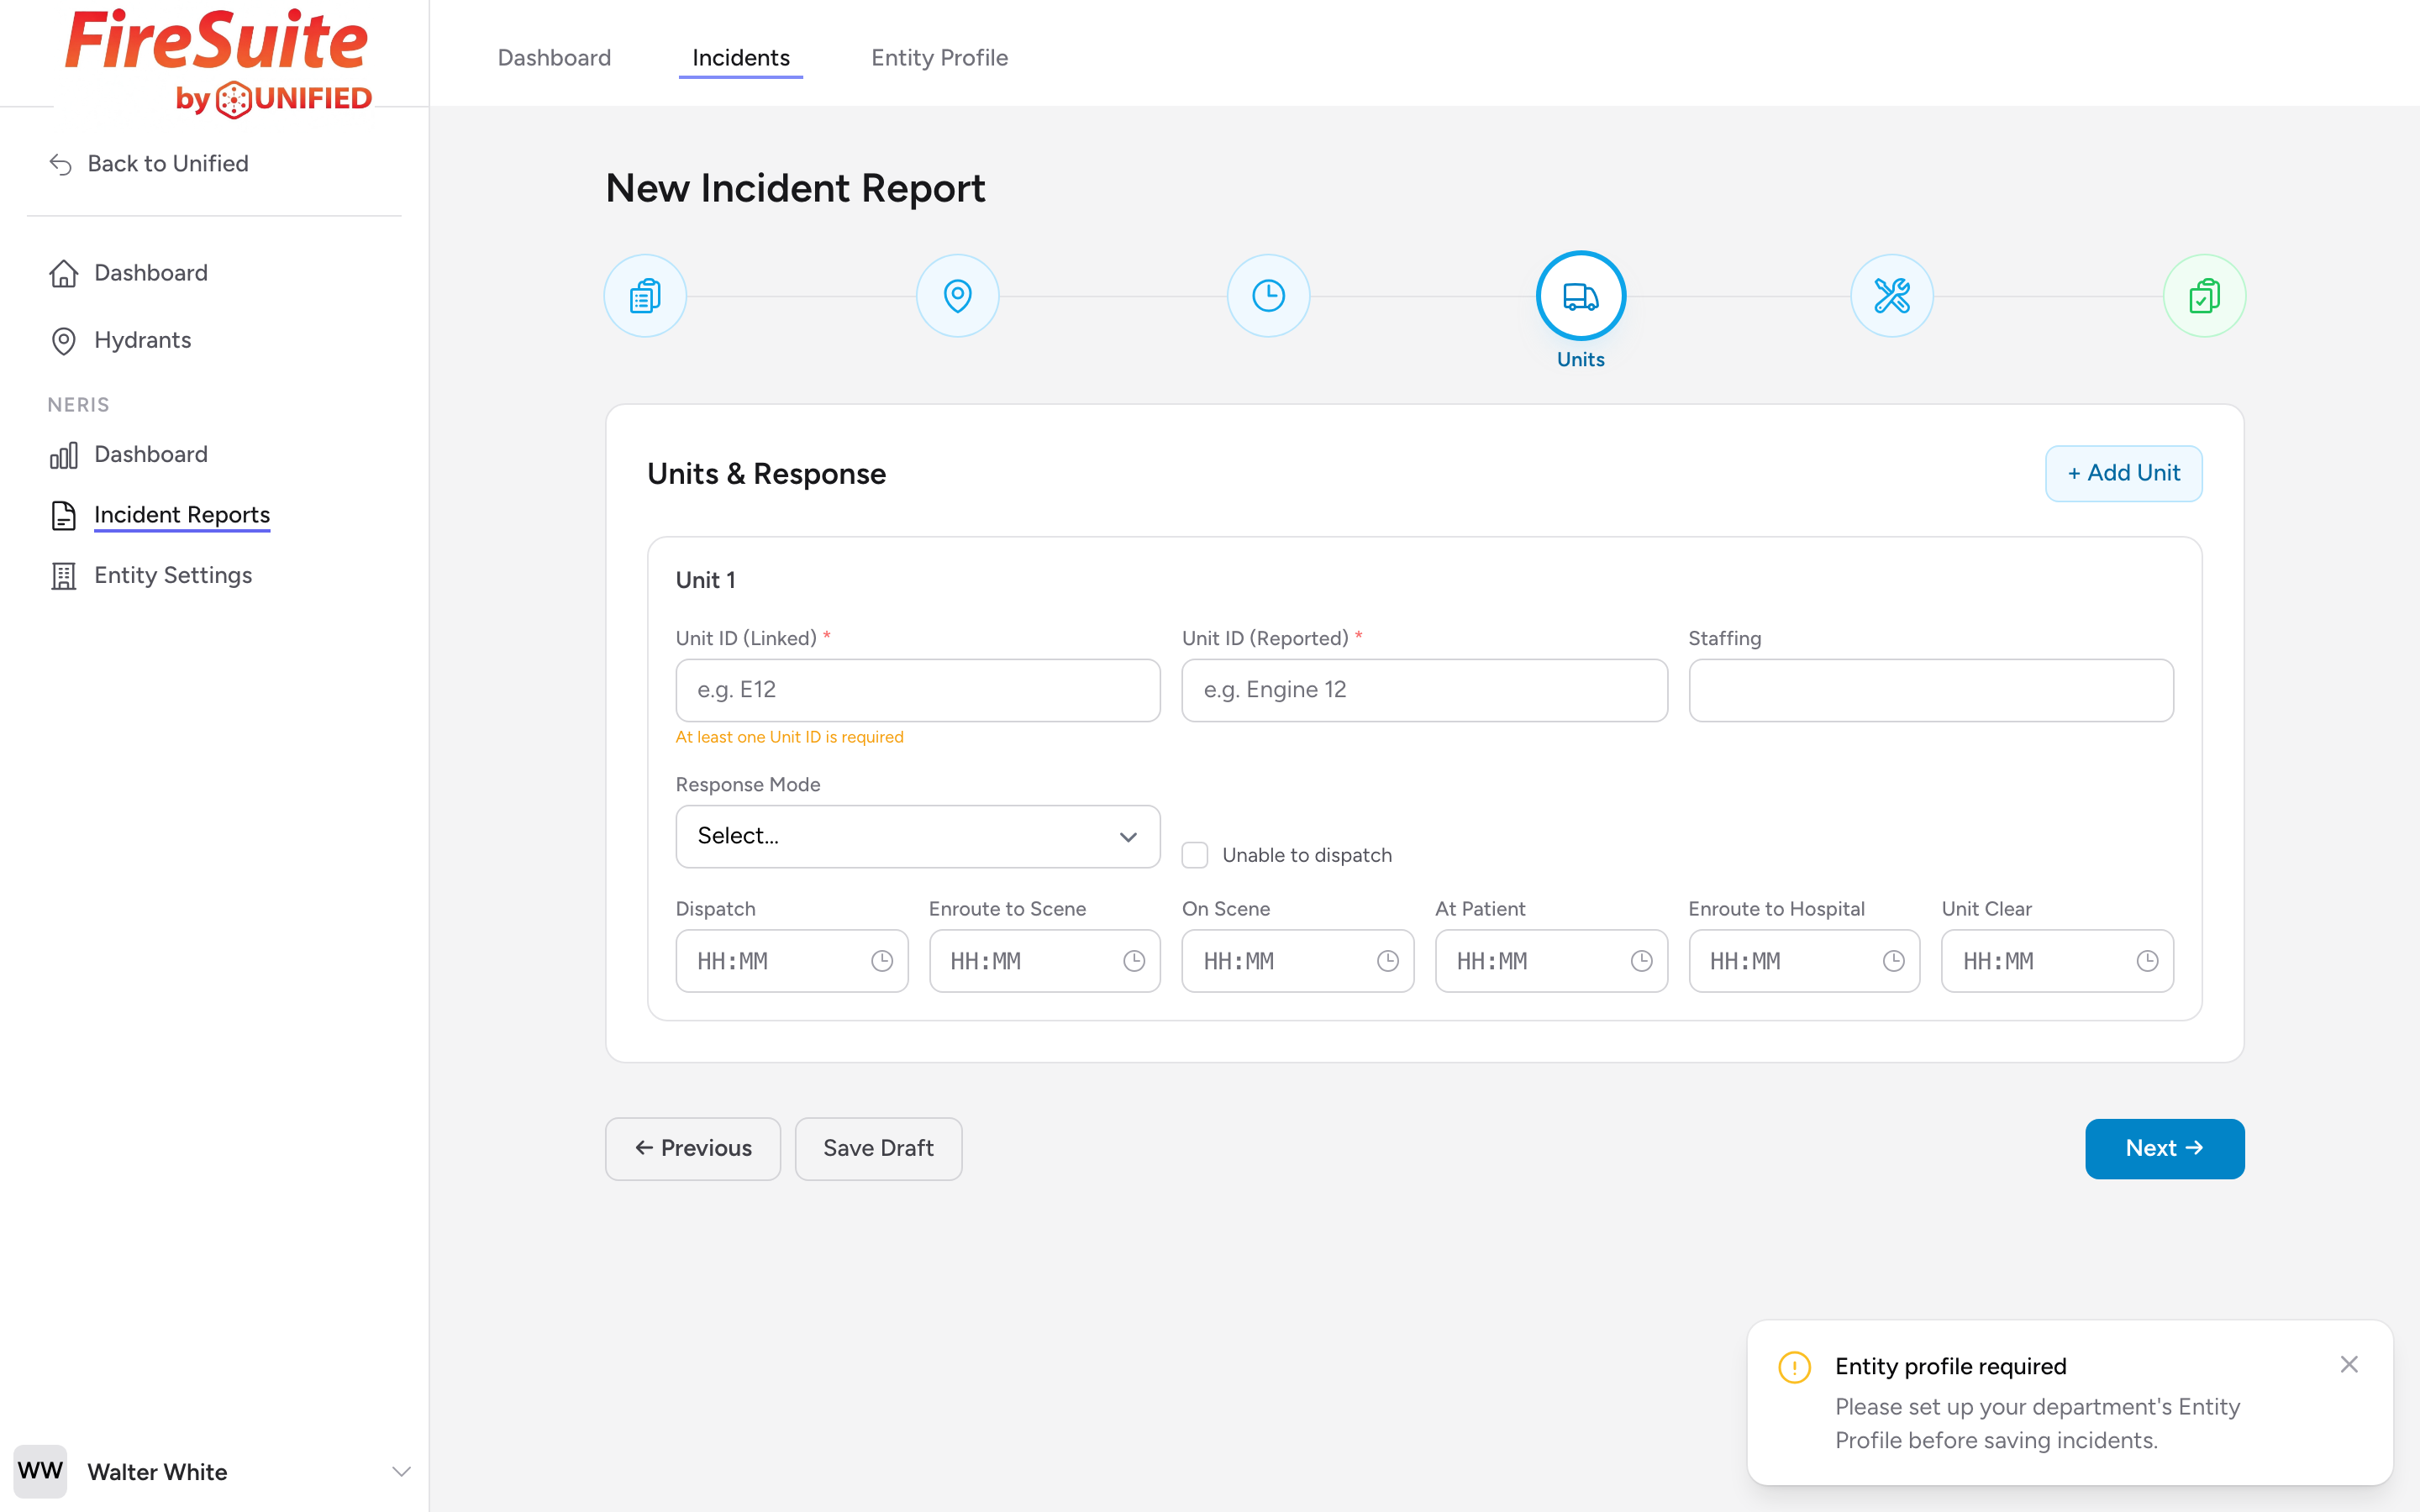
Adding units
The form starts with one blank unit card. To add more, click + Add Unit. Each unit card includes:
- Unit ID (Linked) -- Pick the unit from your department's configured list. At least one of the two Unit ID fields is required.
- Unit ID (Reported) -- Type the unit identifier as it appeared on dispatch (for example, "Engine 12").
- Staffing -- How many people were on the unit for this call.
- Response Mode -- Emergent or Non Emergent.
- Unable to dispatch -- Check this if the unit was assigned but could not go.
Unit timestamps
For each unit, enter the times in 24-hour format:
- Dispatch -- When the unit was dispatched.
- Enroute to Scene -- When the unit started moving toward the scene.
- On Scene -- When the unit arrived on scene.
- At Patient -- When the crew reached the patient (medical calls).
- Enroute to Hospital -- When the unit left the scene headed to a hospital.
- Unit Clear -- When the unit was available for the next call.
Example
Engine 1 and Rescue 3 both respond to a medical call. Engine 1 arrives first with 4 firefighters. Rescue 3 arrives two minutes later with 2 paramedics and transports the patient. You add two unit cards: Engine 1 with Staffing 4 and its times; Rescue 3 with Staffing 2 and its times, including At Patient and Enroute to Hospital.
Removing a unit
If you added a unit by mistake, click Remove on that card.
Tip: If you are entering times for several units, work from your CAD printout. The dispatch, enroute, and on-scene times are usually listed there in order.