The validation panel is a slide-out panel that lists every error and warning CloudPCR found in your PCR. It is your one-stop place to see what needs to be fixed before you can submit.
How to open it
You can open the validation panel three ways:
- Click the validation status icon at the top of the PCR.
- Click the Val tab on the right edge of the screen. (It is always there, just minimized.)
- Click submit when the PCR has errors — CloudPCR will offer to open the panel for you.
What you see in the panel
The panel has three parts:
Summary
Across the top, the panel shows how many errors and how many warnings the check found. Errors are red. Warnings are amber. You also see small badges that tell you which checks ran — XSD (the basic structure check), National (the standard NEMSIS rules), and State (your state's extra rules).
Issue list
Below the summary, every issue is a card. Each card shows:
- The friendly name of the field that has the problem (for example, "Time of Patient Arrived at Patient").
- The plain-language reason — for example, "This field is required."
- Which check raised it (XSD, National, State, or Custom).
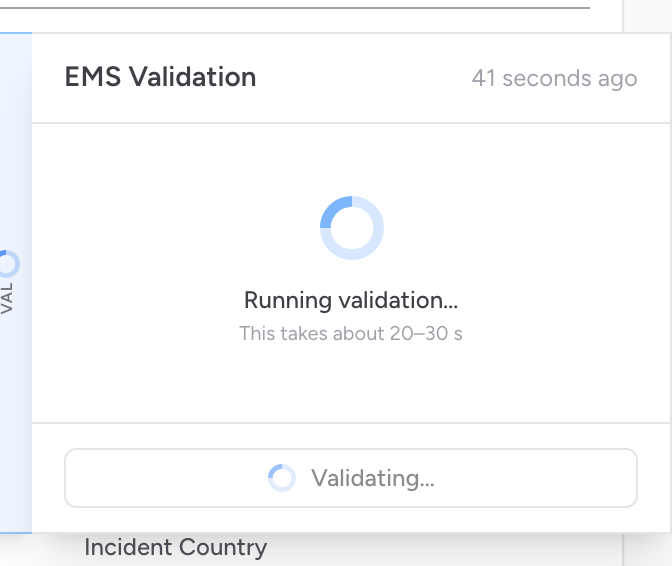
Run Validation button
At the bottom of the panel, click Run Validation to check the PCR right now. The check takes about 20 to 30 seconds. While it is running, the icon at the top spins blue.
Jumping to a problem
The most useful thing about the panel is that every issue card is clickable. Click an issue and CloudPCR will:
- Switch to the right tab.
- Scroll the field into view.
- Briefly highlight the field with a red glow so you can see exactly which one needs your attention.
Fix the field, then come back to the panel and click the next issue. Repeat until the list is empty. Or just click Run Validation at any point to recheck.
Errors vs warnings
Errors block submission. Warnings do not — but warnings exist for a reason. Some warnings are about missing data that is technically optional but really should be there. Others are flags from your state that they would like to see. Look at every warning before submitting and decide if it is worth fixing.
An example
You finish a chest pain transport and click submit. CloudPCR shows you a popup that says Validation Issues Found and suggests opening the validation panel. You click that. The panel slides out from the right and shows 4 errors and 2 warnings. The first error says "Time of Unit Arrived on Scene — required." You click it. CloudPCR jumps to the Incident tab, scrolls to the Times section, and highlights the empty field. You enter the time, jump back to the panel, click the next issue, and so on. Five minutes later all four errors are fixed, the icon at the top is green, and you click submit again. This time it goes through.
Tip: The validation panel checks against your state's rules, not just the national NEMSIS rules. If your state has an extra requirement that NEMSIS doesn't, the panel will catch it before your state's repository rejects your submission.