The Labs event type records lab results and imaging studies you performed or received during the call — point-of-care labs on the truck (lactate, troponin, capillary blood gas), and imaging studies with file attachments (PDF, JPEG, DICOM).
Add a lab or imaging study
- On the Timeline tab, click + Labs.
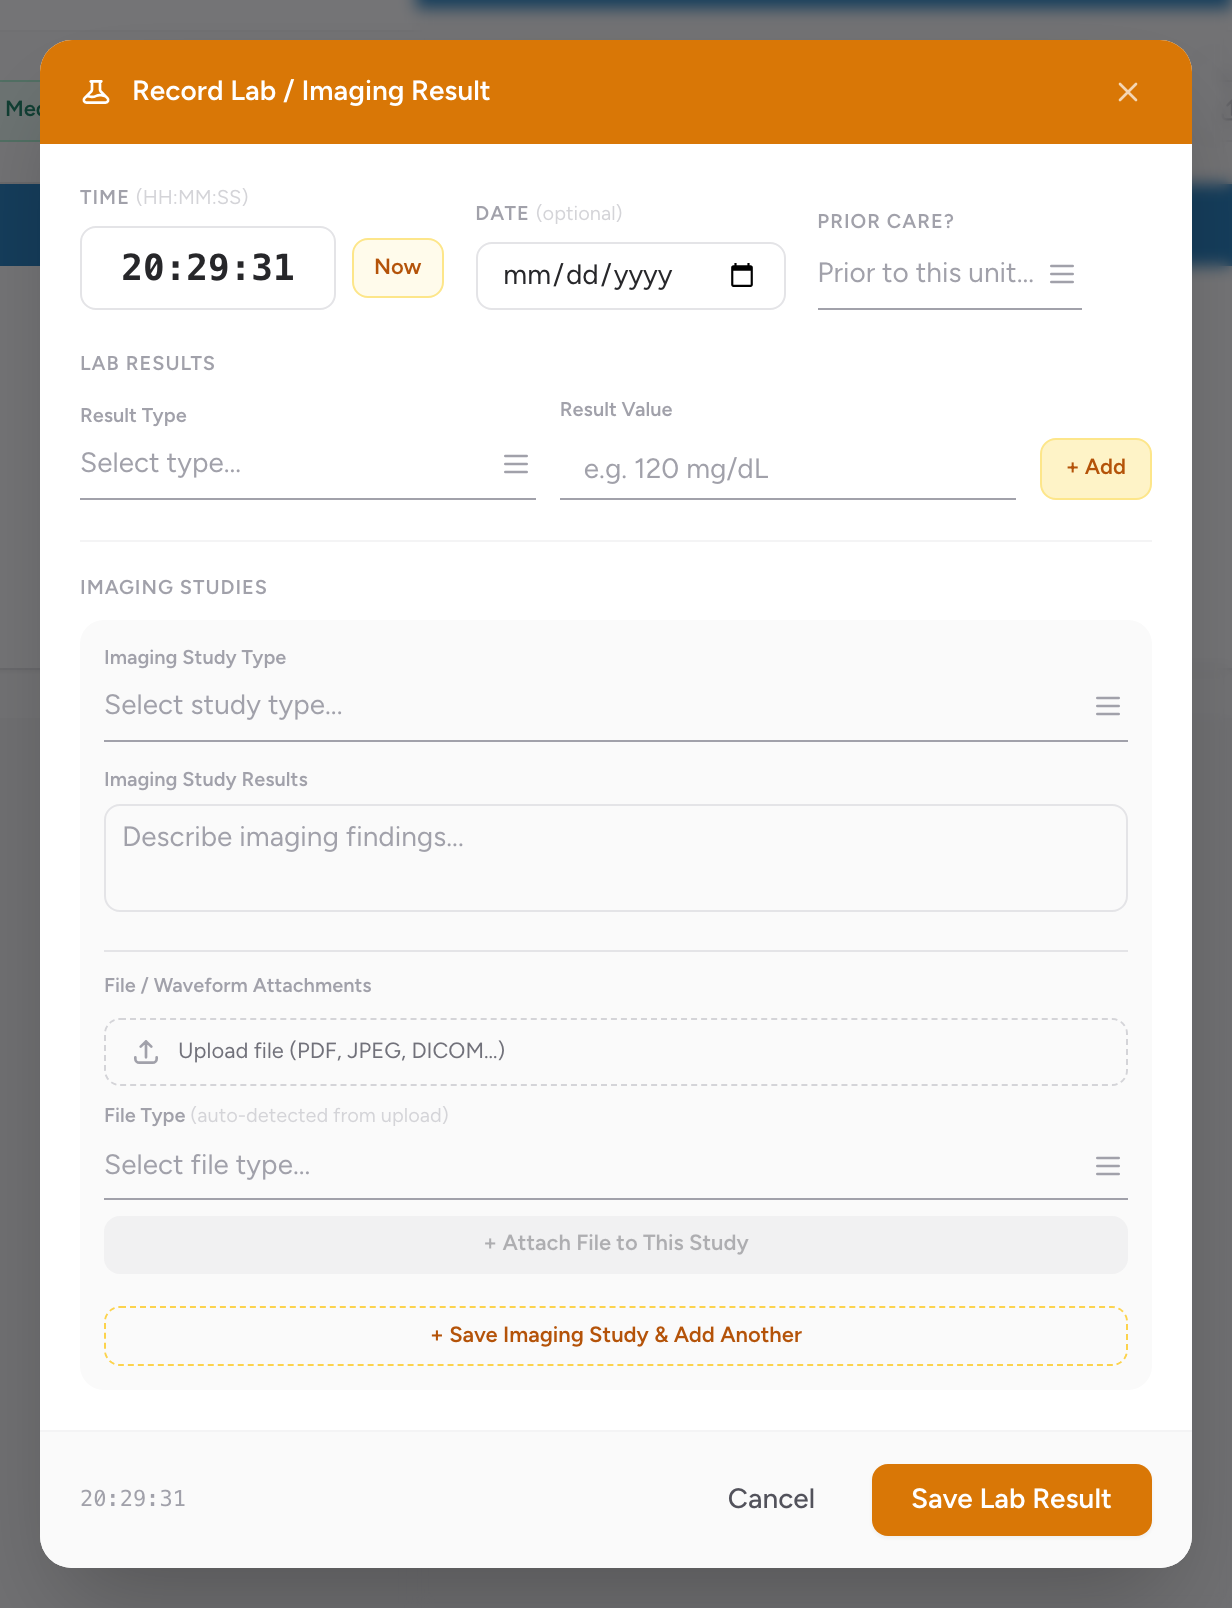
- The Record Lab / Imaging Result modal opens.
- Enter the Time, or click Now. Add a Date if the sample was taken on a different day (optional).
- Set Prior Care? if the study was done before this unit's EMS care.
- Under Lab Results: pick a Result Type, enter the Result Value (e.g. 120 mg/dL), and click + Add. Repeat for each result — multiple results can be attached to one Lab entry.
- Under Imaging Studies (optional): pick the Imaging Study Type, describe the Imaging Study Results, and attach files. The file type is auto-detected from the upload.
- Click Save Lab Result.
Tips
Blood glucose is normally entered with the vital sign set, not as a separate lab entry. Use the Labs event type for things that are not part of a normal vital set — for example, a lactate measurement on a sepsis call, or a 12-lead troponin if your service runs them.
An example
You respond to a suspected sepsis patient. Your agency has a lactate meter on the truck. You draw a venous sample and run a lactate while en route. The result is 4.2 mmol/L. On the Timeline tab you click + Labs, pick the lactate Result Type, enter "4.2 mmol/L" as the Result Value, click + Add, then click Save Lab Result. The lab now sits on the Timeline next to the IV start and the vital signs.