The Timeline has its own event type for airway management — separate from procedures because airway data is high-value and gets analyzed on its own. Airway documentation in CloudPCR works in two steps: first you set up an Airway Group with the overall indications and any complications, then you add one or more Confirmations for each device you placed.
Step 1 — Set up the airway group
- On the Timeline tab, click + Airway.
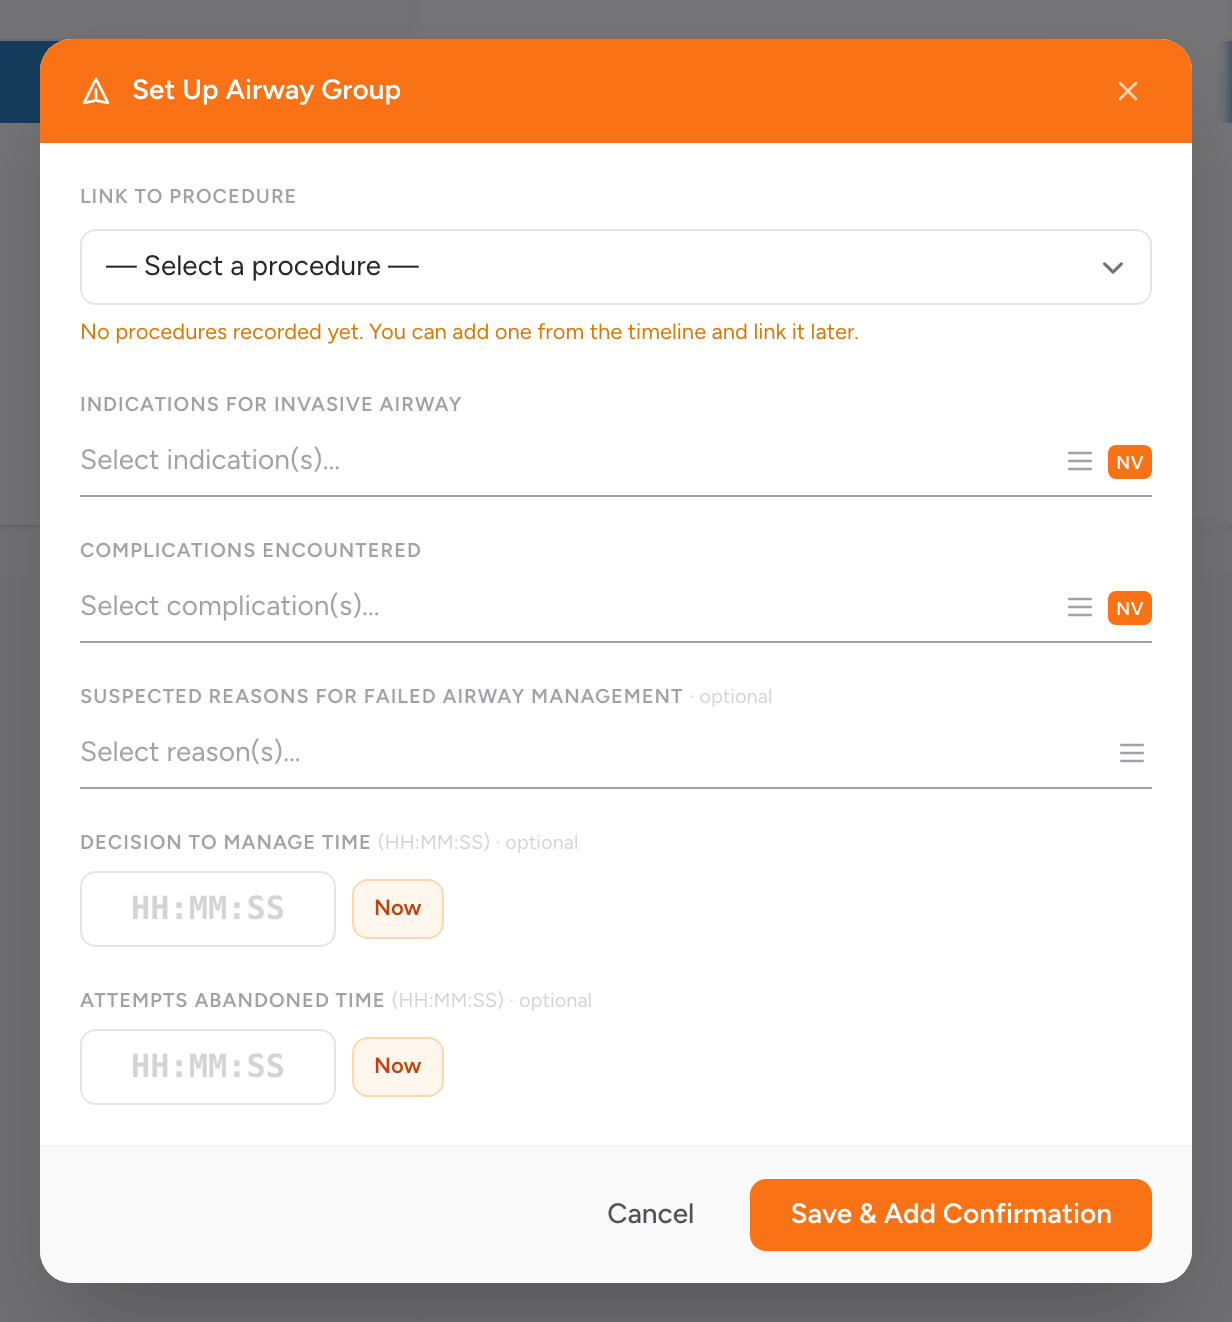
- The Set Up Airway Group modal opens.
- Link to Procedure (optional) — if you have already added the related procedure to the Timeline (for example, endotracheal intubation), link to it here so the procedure and the airway record stay connected.
- Indications for Invasive Airway — pick one or more reasons you managed the airway (respiratory failure, airway protection, cardiac arrest, trauma, etc.). Required for state submission.
- Complications Encountered — pick any complications you ran into, or mark none. Required for state submission.
- Suspected Reasons for Failed Airway Management (optional) — fill in if you attempted an advanced airway and could not place it.
- Decision to Manage Time (optional) — the time you decided to manage the airway.
- Attempts Abandoned Time (optional) — if you abandoned attempts, when.
- Click Save & Add Confirmation. The airway group saves and the confirmation modal opens.
Step 2 — Record a confirmation
A confirmation captures the specific device you placed and how you confirmed it was in the right spot. You can add more than one — once for each device.
- In the Record Airway Confirmation modal, enter the Confirmation Time, or click Now.
- Check Performed prior to this unit's EMS care if another crew placed the airway before you took over.
- Airway Device Being Confirmed — pick the invasive airway device you placed (Endotracheal Tube, SAD-King, SAD-LMA, SAD-Combitube, Cricothyrotomy Tube, Tracheostomy Tube, or Other-Invasive Airway).
- Tube Size — fill in for ET tubes and supraglottic airways (for example, 7.5 mm internal diameter).
- Tube Depth — the cm mark at the patient's teeth or lips, when applicable.
- Confirmation Method(s) — pick every method you used to confirm placement (waveform capnography, breath sounds, chest rise, EDD, visualization).
- Confirmed By — Type — the type of crew member who confirmed (paramedic, EMT, physician).
- Crew Member (optional) — the specific crew member.
- Click Save Confirmation.
Adding another confirmation
If you switched devices (for example, placed a King airway and later upgraded to an endotracheal tube) or reconfirmed placement after moving the patient, click + Confirmation on the Timeline to add another. Every confirmation belongs to the same airway group.
An example
You respond to a cardiac arrest. Your partner bags the patient while you run compressions. After two rounds of CPR, you place a King airway on the first attempt and confirm it with waveform capnography and breath sounds. Later, after ROSC, you upgrade to an endotracheal tube.
Set up the airway group: click + Airway, pick Cardiac Arrest as the indication, mark No Complications, click Save & Add Confirmation.
First confirmation: SAD-King, tube size 4, depth 24, confirmation methods waveform capnography and breath sounds, confirmed by you (Paramedic). Save Confirmation.
Second confirmation: click + Confirmation, pick Endotracheal Tube, tube size 7.5, depth 22, confirmation methods waveform capnography and breath sounds, confirmed by you (Paramedic). Save Confirmation.
Both confirmations show up on the Timeline in the order they happened, grouped with the same airway group.
Tip: Airway data feeds NEMSIS and national airway registries. The indications and complications fields are what make the record usable for quality review. Do not skip them — if there were no complications, pick No Complications rather than leaving the field empty.